Thursday, April 30, 2020

Restoring the Durango's front end. (Or, pandemic activities so far.)

As I am writing this, the world is in the midst of a pandemic.  This means that I go to work one day a week, if I am lucky. This also means that she works from home, and to me, since my bathroom remodel is on hold, no better time to get some work done on the Dodge.

Many of the parts and tools I have had on hand for awhile now, just taking up space in the shed.  This past week or so I decided to put some of them to use.

What I accomplished:
*"New" grille installation.
*Recondition the rubber and plastic parts behind the grille.
*Repaint the AC condenser and the front bumper support black.
*Repaint the front bumper cover.
*Restore the fog lights for better clarity.


The first item on the list was the grille.  I managed to find a non cracked, complete grille in the salvage yard (good luck with that quest) but it was the wrong color.  400 grit sandpaper, primer, and a few coats of matched paint later, and it was installed.  I used the original grille to replace any damaged hardware (a common problem) and installed a donor grille support as well.

This is about the time I noticed the AC condenser.
Chipped and peeling paint, along with the bumper support (exposed when I removed the cover) greeted me.  I decided to remove the rust and loose paint, and then spray it all flat black.  Below is what the parts looked like after a couple of coats of primer.  I also removed the headlights to protect them from overspray.  One of the first rules of cleaning it up, is if it can be removed, remove it.  If  you cannot remove the parts that should not be painted, you should mask them off as carefully as possible.  You can see below that the fog light wiring, fenders and petcock for the radiator are masked off. I also placed the turn signal bulbs in bags to prevent overspray from getting on them.

Here is the finished support and AC condenser respray.  I reattached the headlights at this point.  I had also removed the plastic cover that protects the condenser lines and polished those lines, forgetting that they will, in fact, be covered.
There are 16 different fasteners that hold the cover in place.  Removing the turn signal housings was required to get at two of them that are hidden under the housings.  The reason for removing and refinishing the cover is because there were scuffs, gouges and other marks in the cover.  I also wanted to restore the fog lights' clarity.
 I had some epoxy on hand to repair the gouges, and the additional holes that were in the cover for whatever reason.  I left the holes for the license plate bracket in place as I will be reinstalling it.  Filling the holes, then rough sanding the epoxy left me with this.
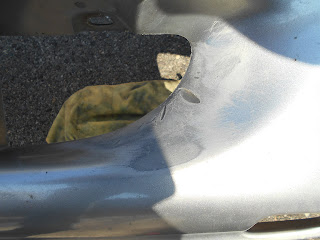
The next step was to sand it all down with 220 grit paper, to rough up the surface and to remove the 80 grit sanding marks.  Below is a close up of the gouge after the initial sanding to help the epoxy bond to the cover.  I had to apply more epoxy to fill this gouge in as shown below.
Next up are two coats of a sealer primer, followed by 400 grit wet sanding.  Then I applied a filler primer to level out and sand flat any imperfections.  At this point I had this, ready for paint.
I mentioned earlier that I was going to clean up the fog lights.  After removing them from the cover, I started with these.  Foggy, yellowing lenses just will not cut it.

The first order of business was to clean up the light assembly.  I used a glass cleaner to get the crud off of the lenses and then a metal polish to remove the haze.  Below are the results. Polished on the left, not so much on the right.  Once both lenses were polished, I sealed them with a polymer found in a headlight restoration kit.  The same was done to the headlight assemblies.
The finished product (fog lights).
I am also a big stickler for the hardware looking good as well, even if it will never be seen.  So, the metal hardware for the cover was cleaned up and painted flat black.  I did the same to the screws that secure the fog lights to the cover.

So after painting, wet sanding, painting, more wet sanding, touch up painting and clearcoat, this is the finished product.  I used a bright platinum metallic paint made by DupliColor, As far as I know, they are the only company that makes this paint available in a spray can.  

 As far as the plastic and rubber pieces go, I soaked the rubber parts in mother's back to black overnight, and buffed them with a microfiber cloth to a clean finish.  The large plastic part was also buffed with back to black and reinstalled.  I also did the same thing to the front license plate bracket, as I had decided to reinstall it.
Here is the gasket that keeps the grille from chattering while driving down the road. The purpose behind rehydrating these pieces was so that they look better and also so that they do not dry out and start to crack.
Finally, the results.  It doesn't make the truck faster, but it does make it safer (improved light clarity) and it makes it look better.
finished result

fog light close up.


Tuesday, March 10, 2020

How to replace a clockspring. (Air bag repair.)

The air bag light came on one day while I was driving.  This, by itself, is not a huge cause for alarm when it comes to passing the annual safety inspection, because oddly enough, the air bag is not required to work to pass the inspection.  The horn, however, is required to work. This was my first clue that whatever the issue was, it was in or near the steering wheel.

Ordinarily, I would need to use a scan tool to determine what part of the air bag system (also referred to as the safety restraint system) had failed, but there were some telltale signs of what exactly had failed.  In my case, the steering wheel mounted controls (cruise control, radio controls, and the horn) were not working but the fuses were all intact.  I also noticed one time that when I turned the wheel all the way to the right when I parked the truck, that when I started the truck later on,  the wheel mounted controls were ok until I turned the wheel over one revolution to the left.

In most cases, you will need to have someone scan the vehicle computer(s) to determine what part has failed.  This is because in addition to the clockspring, there are also crash sensors, occupant sensors, the air bag itself, an air bag module, and possibly others as cars become more and more complicated (and expensive) to work on.

You will need to have an assortment of screwdrivers to remove the clockspring, as well as a steering wheel removal tool to get the wheel out of the way.  Some places will rent you the steering wheel removal tool (a specialty tool) and you will have to do some research as far as what screwdrivers (or other drivers) you need to remove the other parts.

Step one is going to be to disconnect the battery after you place the front wheels in the straight ahead position.  Do not use a memory minder as you want no electrical power going anywhere.  Negative cable first, then positive cable.  You will also have to wait for the system to power down.  My suggestion is to wait one half hour at least.  Make sure that the steering wheel is in the straight ahead position.
Once the battery has been disconnected entirely and the power has left the system, you will need to remove the airbag assembly.  This is usually accomplished by removing two bolts accessible from the back of the steering wheel itself, as shown below.
Once the airbag bolts have been removed, the airbag itself can be partially removed from the steering wheel.  There will be some wires going to the airbag, as shown below.  Carefully remove the wires by their connectors and discard any wiring that is also replaced with the new clockspring assembly.
(ABOVE) This wire has a replacement supplied with the new clockspring, so it will be discarded.

Place the airbag face down (shown below) so as not to damage it.  You will now see some additional wiring, depending on your vehicle's make, model, and options.

If there are additional wires and plugs, they will connect the steering wheel controls and horn to the clockspring, as shown above.  These are usually held in by tabs on the connections themselves. In my case, using a screwdriver to press in on the tabs in question will free the plugs.  Pull them out and continue to the next step. which is to remove the steering wheel.  This is where the removal tool comes into play.
There will be a bolt or nut holding the wheel into place. Loosen, but do not remove it fully, as the steering wheel removal tool will need to press against it and you do not want the wheel to come off without being restrained, as it can break loose with some force.
(ABOVE) With the bolt loosened, install the removal tool.  The holes on either side of the bolt are threaded to accept the long bolts that are part of the removal tool.
(ABOVE) The bolts should be turned in to the same depth and the bracket should engage the bolt heads evenly. Now you can install the jack screw that will actually pull the wheel off.
Now, using a socket and ratchet, start tightening the jack screw slowly.  It will take a few turns, but the wheel will pop off of the steering column.
I had removed the cover for the steering column earlier, but once that is done (if required) you will be staring at the clockspring.  There are wires connected into the back of this, at the bottom.  Using a small screwdriver, press in those tabs and remove them.  Then remove the screws that hold the clockspring assembly in place.
Here are the old assembly (left) and the new one (right).  The new one has a pin that holds it in center. Do not remove the pin before attaching the new assembly to the steering column and connecting the wires on to the back.
Reconnect the wires into the front of the clockspring. Then reattach the steering wheel and torque the bolt to the factory specification.  This will be surprisingly little torque.  Over tightening the bolt or any other screw may result in damage to the column, steering wheel, or other components. You should remove the retaining pin from the clockspring assembly at this time.

Now, connect the wiring to the airbag assembly, making sure that all wires are in fact, fully attached.  You should hear a positive snap when the connection is complete.  Reconnect the battery and start the vehicle from the passenger side.  Also, when you attach the battery cables, if the horn is going off, disconnect the battery again and check all connections.  This happened to me.  It turns out that the main wire to the airbag (that also powers the horn) was not fully seated.  This is also why the last thing I did was to reinstall the column cover.

This is the result I was looking for, no air bag light.  You may have to reset the light manually or have someone with a proper scan tool reset it for you.  (Hint: the $40 dollar scan tool will not do this, a scan tool has to be set up to read and clear SRS codes and those are expensive.)  As it stands, my vehicle will reset itself.
And here we are, the reassembled steering wheel in its entirety.  Start the vehicle to make sure that nothing is loose and that you can turn the wheel through its full range without setting the airbag light off.

Some reminders worth mentioning again for you in closing:

The battery must be disconnected when servicing the SRS system.

You will need a steering wheel puller to remove the wheel.  Do not try to hammer it off or count on it just falling off on its own.

Over torqueing the bolts may damage the various components found on the steering column.  Consult a factory manual for the proper torque settings and follow them to the letter.

Make sure the bolts are going in straight.  Damage to the threads will be the result if they are not.

If in any doubt, consult a professional.  It is better to pay to have it done right than try to save a few bucks if you are unsure.

Airbags can injure you if they are improperly installed. This also applies to the latest generation of airbags.

If the air bag/SRS light remains on after the repair, the system may need to be reset with a scan tool.