Many of the parts and tools I have had on hand for awhile now, just taking up space in the shed. This past week or so I decided to put some of them to use.
What I accomplished:
*"New" grille installation.
*Recondition the rubber and plastic parts behind the grille.
*Repaint the AC condenser and the front bumper support black.
*Repaint the front bumper cover.
*Restore the fog lights for better clarity.
The first item on the list was the grille. I managed to find a non cracked, complete grille in the salvage yard (good luck with that quest) but it was the wrong color. 400 grit sandpaper, primer, and a few coats of matched paint later, and it was installed. I used the original grille to replace any damaged hardware (a common problem) and installed a donor grille support as well.
This is about the time I noticed the AC condenser.
Chipped and peeling paint, along with the bumper support (exposed when I removed the cover) greeted me. I decided to remove the rust and loose paint, and then spray it all flat black. Below is what the parts looked like after a couple of coats of primer. I also removed the headlights to protect them from overspray. One of the first rules of cleaning it up, is if it can be removed, remove it. If you cannot remove the parts that should not be painted, you should mask them off as carefully as possible. You can see below that the fog light wiring, fenders and petcock for the radiator are masked off. I also placed the turn signal bulbs in bags to prevent overspray from getting on them.
Here is the finished support and AC condenser respray. I reattached the headlights at this point. I had also removed the plastic cover that protects the condenser lines and polished those lines, forgetting that they will, in fact, be covered.

Next up are two coats of a sealer primer, followed by 400 grit wet sanding. Then I applied a filler primer to level out and sand flat any imperfections. At this point I had this, ready for paint.
I mentioned earlier that I was going to clean up the fog lights. After removing them from the cover, I started with these. Foggy, yellowing lenses just will not cut it.
The first order of business was to clean up the light assembly. I used a glass cleaner to get the crud off of the lenses and then a metal polish to remove the haze. Below are the results. Polished on the left, not so much on the right. Once both lenses were polished, I sealed them with a polymer found in a headlight restoration kit. The same was done to the headlight assemblies.
The finished product (fog lights).
I am also a big stickler for the hardware looking good as well, even if it will never be seen. So, the metal hardware for the cover was cleaned up and painted flat black. I did the same to the screws that secure the fog lights to the cover.
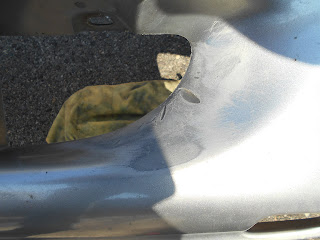
So after painting, wet sanding, painting, more wet sanding, touch up painting and clearcoat, this is the finished product. I used a bright platinum metallic paint made by DupliColor, As far as I know, they are the only company that makes this paint available in a spray can.
As far as the plastic and rubber pieces go, I soaked the rubber parts in mother's back to black overnight, and buffed them with a microfiber cloth to a clean finish. The large plastic part was also buffed with back to black and reinstalled. I also did the same thing to the front license plate bracket, as I had decided to reinstall it.
Here is the gasket that keeps the grille from chattering while driving down the road. The purpose behind rehydrating these pieces was so that they look better and also so that they do not dry out and start to crack.
Finally, the results. It doesn't make the truck faster, but it does make it safer (improved light clarity) and it makes it look better.
 |
| finished result |
 |
| fog light close up. |


No comments:
Post a Comment