So today I decided to take advantage of the unusually warm weather and complete the tune up I have wanted to do for awhile. For this service, I gathered four Autolite spark plugs, BWD distributor cap and rotor, a spark plug wire kit, a Purolator air filter (just a paper one because oiled filters won't help this engine enough to justify the expense), and a serpentine belt. I also used disposable gloves, dielectric grease, anti-seize compound, masking tape, a sharpie, and a can of throttle body cleaner.
 |
| Gee Mr. Dale, what are these parts for? |
 |
| Ok so above you can see I am starting out with the engine all buttoned up...not bad for 226,000 plus miles. All that air box and tubing that sits over the engine needs to come out of the engine bay. |
 |
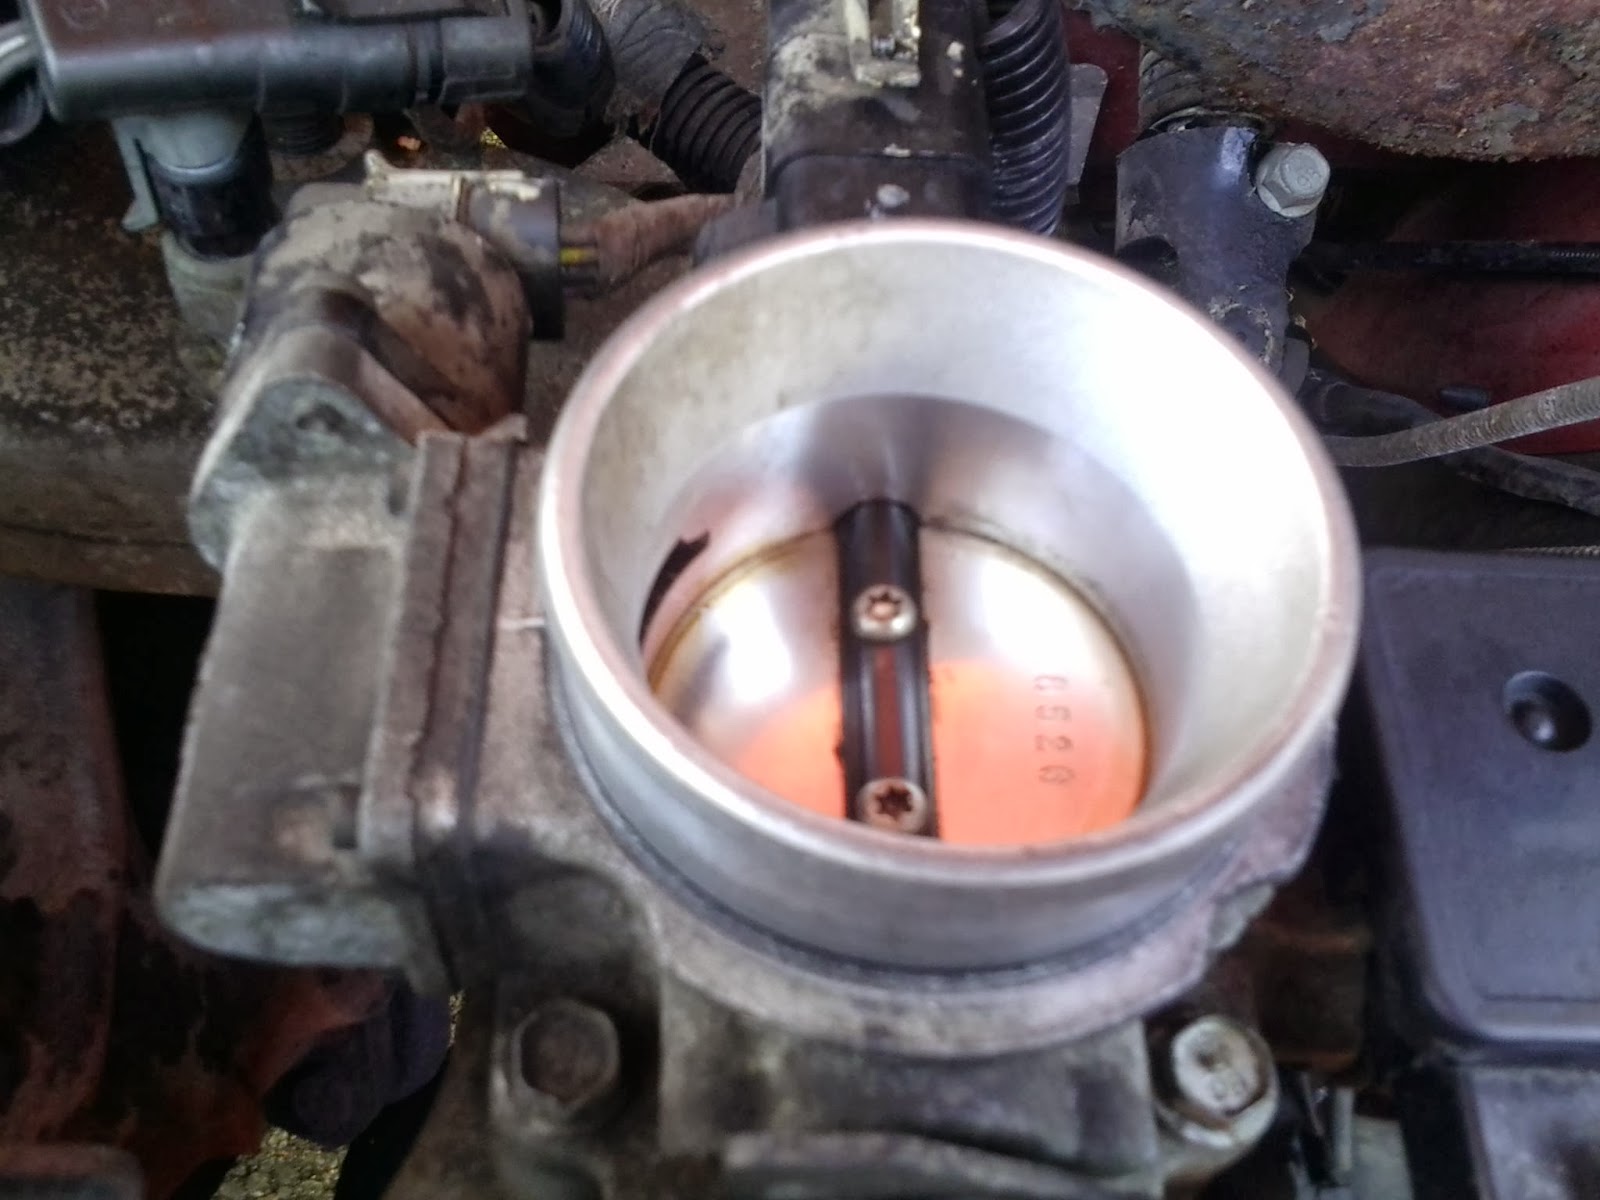
| With the air box out of the way I can start checking things...first is the throttle body, which is to the right... |
 |
| Holy crap did a troll take a dump in here? I tried soaking the butterfly but that alone did not work, so I decided to tackle the rest of the tune up first. |
 |
| Part of the tune up today was changing the serpentine belt. On my truck, this bolt that I am pointing at is what you loosen to move the tensioner and thereby loosen the belt. |
 |
| To get to the number one spark plug I have found it easier to unbolt and set the air conditioner compressor to the side, gently, leaving the lines attached. Note the line separator, loosen but do not remove the nut in the center because you have to move the metal line out of the way, slightly and gently, to get the bolt out of the a/c compressor mount. |
 |
| Here's a tip. Use masking tape and a sharpie to label the plug wires. Use masking tape to hold the plug onto the socket if needed. |
Before I installed the new plugs, I checked the gap and then adjusted it to 0.040 inches. Dodge states that the gap should be 0.035 inches, but I have run a 0.040 inch gap previously on my 1986 Chrysler Laser with the same engine setup with no issues, except for better fuel economy. In the middle of this part of the project I checked the accessory pulleys for noise and wear. The idler pictured below is making noise when you spin it by hand so it will need to be replaced. Then I noticed the coolant leaking around the thermostat housing. Looks like the upper radiator hose clamp might be loose, so I tightened it a little.
 |
| A little while back I was losing coolant. Looks like this is the culprit area, which narrows it down to hose, thermostat gasket or thermostat housing. I tightened the hose clamp but in the future I will pressure test the cooling system to be certain. |
 |
| Its hard to see in this photo but the center of the rotor and the contact are worn. The distributor cap was also worn down |
Before reinstalling the serpentine belt I started the engine and let it run for a few minutes to check to see if the noise I was hearing was valve train or accessory related. I did hear some minor noise which I attribute to either injector noise or rocker arm adjustment needing to be done. The belt also needs to "set" into the pulleys before driving it. Additionally, you would rather the belt go flying off the engine at your home rather than out driving your vehicle around.
 |
| This is way better... |
The reason for cleaning your throttle body, mass air flow sensor, intake tube and anything else having to do with the intake and fuel systems is there is dirt and other junk flying around in the air most of the time. This dirt can get into the engine without a good air filter and cause problems, like making the throttle body butterfly stick closed, hard throttle movement, bad fuel economy, and in general lackluster performance.

So, after doing all this work (took about two hours) the truck is definitely running better. Before the tune up the truck would move but it seemed to be sluggish at times. Now, the throttle response is better, the acceleration is improved, and just overall it feels like there is more power available. I still have to tackle the coolant leak and I still have to see what, if anything, is going on under the valve cover.
No comments:
Post a Comment