Wednesday, August 12, 2015

How to make your headlights clear again

I was tasked with making the headlights on the Buick look clear again earlier this week, because the boss' daughter is headed off to College and of course the headlights need to work.  It also helps that the Buick is in need of inspection this month and of course its got to be perfect.  That being said, I decided that this would make a good blog project to tackle.

What causes the haziness and yellowing of headlight lenses is dirt flying around in the air and UV rays coming from the sun.  Over time, the surface of the plastic will start to break down, and the UV rays are what turn the plastic yellow.  If this gets to be bad enough the damage will cause the lights to shine less brightly due to diffusion and in places like where I live, this could cause you to fail the annual safety inspection.

I used meguairs' Heavy Duty headlamp restoring system, which includes a buffer, two sanding pads (1000 and 3000 grit), a handle for the sanding pads, a bottle of plastic polish/cleaner, a bottle of plastic polish, and a microfiber towel.  You need to provide a spray bottle, a drill (the instructions recommend a corded drill but I used my cordless), masking tape and paper, a second microfiber cloth or lint free towel, and about an hour or so of your time.  I will also mention that this kit is for plastic lenses only.  This kit will work on tail lights if needed but should not be used on plexiglass or glass surfaces, like your windows.  You are also going to want to do this in a shaded area, so the components don't dry immediately when being applied.
This is the kit out of the box, sorry for the poor quality picture in advance.

Your first task is to clean off the headlights, and mask off the surrounding painted surfaces if you feel the need.  Once this is done, you will have headlights that look like this:
They work but they are really hazy.
 
 
Next, spray the light down with water using the spray bottle, spray the 1000 grit sandpaper disc with water, attach the disc to the holder, and start sanding the headlamp lens using back and forth (not circular) strokes.  Spray the lens with water frequently, as you need to make whatever you sand off float away.  In a while, you should have a less hazy lens.
 
Your next step is to attach the 3000 grit sandpaper disc, spray that disc and spray down the entire lens again, and sand as you did before, with back and forth strokes.  Don't forget to spray down the lens regularly to keep the paper wet and the lens clear of sanded off debris.  This process is called wet sanding, and it is the same process used to sand paint nibs off of a newly painted car. Now you should have something that resembles the picture below.
 
You can tell by looking more at the headlight lens that we now have a somewhat clear lens, but now we have to buff out those scratches that we put into the lens with the wet sanding.  Install the buffer to the drill and add about a nickel sized dab of the plastic polish/cleaner as shown below.
 
If my camera wasn't over ten years old you could probably see the product.  Before starting to buff and polish the headlamp I like to spread the polish across the lens, to reduce slinging the polish off into space or something.  At this stage I would recommend that you polish one small area at a time, and add more polish to the buffer as needed to get the results you desire.  Make sure to keep the buffer as flat as possible and never use the edge to apply polish.

 
In the above picture I am applying the polish/cleaner to the lens.  Yes the drill is off, but this is what I mean by keeping the buffer as flat as possible.
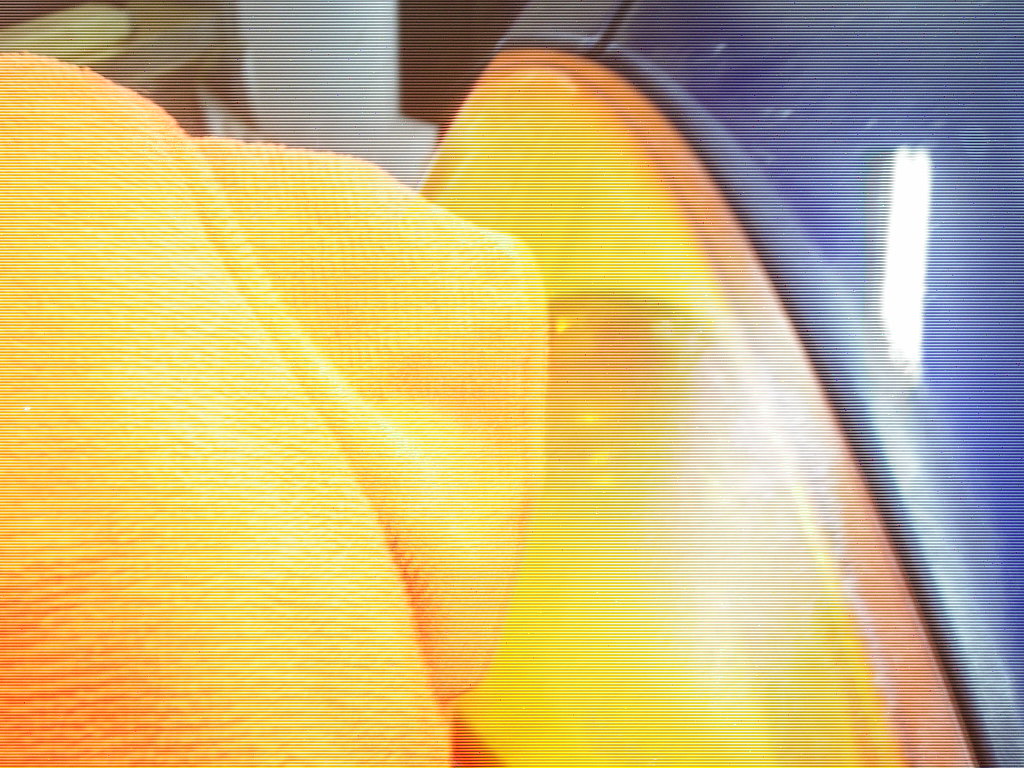
 
Once you have buffed out the entire lens surface, use the microfiber cloth to remove the cleaner that will have coated the lens.  Turn the cloth often to expose a clean surface to remove the residue.
 
Here is the almost end result, in this case you can now see the detail of the reflective surface for the turn signal lens on the inside and the headlamp is almost as clear.  In this case since the headlamp bulbs get really hot and the car has over 140000 miles on it there is some minor heat damage on the inside that you really cannot repair.
Last step is to use the headlight protectant to seal the lens and protect your hard work. I applied mine with a lint free cloth and buffed with the microfiber towel after shaking out any dried polish from the previous steps.


Above is the left headlamp before anything was done to it.  Below is the finished result.  Even with my shitty camera you should see a difference.


So, what do I think?
 
While the product in kit form is convenient because you get almost everything you need, I would like to think that maybe two discs each of the 1000 and 3000 grit sandpaper would be nice to have, as well as a foam buffer as opposed to what looks and feels like a wool buffer.  Another nice touch would have been to have the buffer removable for cleaning it out.  As it stands for almost $26 I have headlamps on this vehicle that I am hoping I do not have to hear about for awhile. 
 
One thing I will do as I use the buffer is check to make sure that it is still well bonded to the attachment that goes into the drill, as if this were to ever come apart I can see gouging the lenses very badly is a very short amount of time.
 
Most people have a drill to use with this project, and spray bottles can be had at the local dollar store for, well, a dollar and water comes right out of the tap in most places.
 
I would also point out that for light cleaning and polishing that the 1000 grit paper step could probably be skipped.
 
Would I recommend this product? Yes.


Saturday, July 11, 2015

Swing cylinder rebuild

At work we have an old Kubota L2850 with a backhoe attachment made by Woods. When I first started working there,  the backhoe had its issues, such as slow swing movement from side to side, and a horrendous leak from the upper cylinder on the dipperstick. The upper cylinder was rebuilt about three weeks before this repair, so that took care of the leak there. The swing cylinder movement became worse, and eventually got to the point where unless you had the engine revved up really high, it would not move at all.  This is not good for the engine on the tractor nor is it good for the components of the backhoe that are still working ok.

When I examined the machine, I found that I could move the boom left and right by hand with almost no resistance.  Seeing as how there are check valves and so forth that make hydraulic components operate, this should not happen.  It was apparent that it is time for a cylinder rebuild.

What you need for this task:
-Hammer
-various large sockets
-torque wrench
-penetrating oil
-appropriate seal kit
-wrenches and ratchets
-floor jack (2 tons capacity or greater)


This is the bi-directional swing cylinder, meaning that it rides on the chrome shaft and uses a set of attached chains to pull itself to the left and right.  This is how the boom moves on the backhoe.  The first task is going to be removing the nuts that hold the chain to the actual boom. Seeing as this machine is older I soaked these in WD-40 first.

I am sorry for the poor picture quality here, but these are the nuts in question in the top photo.  Once these are removed, the chain is attached by a pin on the end of the cylinder body on the last link of the chain, as shown in the bottom picture.  A cotter pin is removed and then you can tap out the pin with a drift and hammer.  Remove the chain assembly and set it aside.

The chains should move somewhat freely, but these did not, so I soaked them in WD-40 and let them sit overnight.  Over time, they get caked up with dirt, dust, and other sorts of grime.  It also does not help that nobody on these "professional crews"  thinks to clean these machines off and grease them once in awhile.
 
 Just to the left of those hoses is a large bolt that holds the shaft in place.  You will have to move the stabilizer a little bit to access these bolts (one per side).  A floor jack will help with this task, if needed.


On the bottom is the impact wrench I tried to get the bolts out with.  On the top is my one inch impact wrench which I used because I wanted them out in a more timely fashion.  Sometimes I get tired of trying to make that half inch gun work, so when that happens I get out the big dog.

After removing the bolts from the shaft ends, and disconnecting the hoses that run into the cylinder body, I removed the swing cylinder with a little bit of effort.  I also set a drain pan under where the hoses are to catch oil coming out of them.  Finally I got the cylinder onto the bench and began disassembly, forgetting that there was oil in the cylinder still and making a huge mess in the process.


To disassemble the cylinder, remove the nuts at one end of the body and set aside, then remove the long bolts and set aside as well. Using a hammer, gently tap on one end of the cylinder body (you should be able to tell where it separates) until it comes out.  Remember that this is aluminum, and that it could crack, rendering it useless.  This is the time where you will want a catch pan for the oil that will come out all at once.  Or you can make a mess, like I did.


After tapping the other end of the body out, the shaft will come out with it. This white ring in the center of the shaft is the failure point.  Its job is to keep the oil from flowing all the way through the cylinder, creating two separate chambers that can be filled with oil and emptied of oil, which causes the movement of the cylinder.  In this case, the oil could fill the entire cylinder and move from side to side, which is why I could move the boom by hand.  This ring as shown is supposed to be one piece, not broken and worn.


 Open up your seal kit (in my case, Woods part number 37873) and make sure you have every seal in the package.  Using the operators manual, I took note of how many pieces were listed and placed them left and right side, and center.  The small "O" ring in the center is an extra part, so it is now in the spare parts bins, where it will probably stay forever.
In either end, you have a retaining seal on the outside and a wiper ring on the inside.  Pry out the wiper ring (blue hard rubber) and make note of its orientation.  It will be difficult to install the new one but I have found using a blunt tool to push the wiper into place helps.  Make sure to fully seat the wiper ring.  Using a pry tool, remove the retaining seal from its bore, again noting its orientation.  I have found using a socket that is about the same size as the seal and tapping it in with a hammer will seat it in the bore with minimal difficulty.  Also coating the new seals with clean hydraulic oil helps with installation as well. Do this on both ends.
On the inside of the cylinder end there are two "O" rings, one is round and one has flat sides.  Make note of where they go before removal and replace them in that same manner, again coating them with clean hydraulic oil to ease assembly. In this case, the flat sided "O" ring goes toward the outside, while the rounded one goes on towards the inside. These can be removed with a screwdriver but should be installed by hand.  They will stretch a little (a VERY little) and still retain their shape.
 
For some reason I do not have a picture of the center seals, but remove the remaining outer seal and the inner seal, again using a blunt instrument.  Again coat the new pieces in oil and reinstall. Like the "O" rings these will stretch a little bit and still retain their shape once installed.
 
Now you can reassemble the cylinder. After wiping down the shaft and making sure the cylinder body is free of old seal pieces or dirt on the inside, install one of the cylinder ends first onto the shaft, then onto the cylinder body tube.  This will take some effort so using a hammer and a large socket (one that fits over the shaft) drive the end into the body. Turn the cylinder over and drive in the other end.  Make note of where the hose connectors are, making sure one is on the top and the other on the bottom, opposite of each other.  Reinstall the long bolts and nuts, tightening them to 45 foot pounds of torque as mentioned in the service manual.  Reinstall the cylinder to the backhoe by first installing the bolts to the shaft ends, then connect the hoses.  You might have to move the cylinder position on the shaft to get it back in place and to line up the top and bottom hoses.  Lastly, reinstall the swing chains.  Make note of the holes in the link pins for cotter pin placement.  Test the machine and check for leaks.  If all went as it should have, there should be no leaks and smooth movement.


Friday, July 10, 2015

Ten things I am starting to HATE about being a fleet mechanic.

Like the title says and I am just going to get right to it.

1.) Asking me if I will work on your car.
 The answer is a resounding yes, but there is this sign that hangs in the shop I need you to read and fully understand, that reads as follows: WILL I WORK ON YOUR CAR? YES, I WILL.  THE PRICE IS $60 PER HOUR. IN GOD I TRUST, ALL OTHERS PAY CASH. I base my times on book times, just like the dealerships.  Also, this is not a negotiable price.  No trades, no bartering.

2.)Wanting to have a twenty minute conversation when a minute or two will do. I find this annoying because the more time some people spend talking about what needs to be done, the less time I am putting into a project.  I also find that when I am under a truck, some people think that this is the perfect time to get into a long conversation about what they feel needs to be a "priority".  News flash: it's not your name on my paycheck and until it is you do not decide what I am doing most of the time.  The boss tells me what to do, kind of like he tells you what to do.

3.)Stupid statements like "When I worked at muckety muck two trolls Yugo Restorations LLC INC and some other letters this is how WE did it."
  Do us all a favor and go back.  I might have found your statement interesting the first couple of times you said it.  I might have even considered it.  About the tenth time frankly I am sick of it.  Besides, when is the last time you saw a Yugo?

4.)Asking me to borrow my tools.
  If I do not know exactly who you are, it's NO. No means NO. You have to understand, or refuse to understand, that the tool you want to borrow is how I make my living.  If I don't have tools, I have no way to make money.  I also would like to point out that there are no cheap Walmart tools in my box.  The LEAST expensive of them are NAPA tools.  The vast majority of them come out of my pocket, not the company's pocket.  Also, don't be that dick that opens up the box to see what is in there or just decides that you are going to borrow something without permission.  The standing policy is, as told directly to the company president: "I do not care WHO you are, whose FRIEND you are, who you are RELATED to that works here, I don't care if you have a signed permission slip from GOD ALMIGHTY. You take my stuff that is called THEFT".  Due to the value of the tools it could be considered (and you could be charged with) GRAND LARCENY, a FELONY.  You will most likely do serious JAIL TIME. It's not worth it to not ask, especially since I have rarely said no to anyone.

5.)When are you going to fix (insert some broken piece of shit here).
  Frankly, when I get the parts I need and get around to it.  See list item #2.  If you prove to be particularly irritating about it, trust me I will clean public toilets before fixing that thing you probably broke because you had a dumbass attack.

6.) Telling me how to do my job.
  This is geared more towards the crowd that is mentioned in list item #3.  The example is the same people keep breaking the dump cable on one particular truck, and these people feel that we should go over to some switch set up. (The technical term is bi-directional hydraulic actuator assembly and the industry term is electric over hydraulic set up.)  This takes money, which with parts has never really been argued, and TIME, which I have little to spare.  If you want something to work right, use it properly.  Besides, I am convinced that you will break the switch too.  Do me a favor and let me fix it as it sits without making it into some long drawn out project. This brings us to...

7.)STOP ABUSING THE EQUIPMENT.
  Abuse takes on many forms. This being said the two things I see most are not using the equipment properly and failure as an operator to check it and maintain it.  A one minute walk around would save lots of time as aggravation, as you might see that rim that is about to fall off or that flat tire.

8.)Know what is expected of you.
  Recently we had a truck stopped for a laundry list of items wrong with it, including no inspection certificate (locals call them "inspection stickers").  When this happened, the driver, who advertises themselves as a commercial driver with years of experience, calls me on my phone thinking that I can go out there and magically make the problems go away. The reality is, I cannot do that. I didn't take the call because if I don't know the number, I just wont answer in most cases.  My job is to repair and maintain the vehicle, including prepping it for, but not conducting, the inspection.  The Department of Transportation clearly states that pre trip inspections and reporting defects is the responsibility of the driver of the vehicle.  This includes checking the fluids and tires and making sure nothing is about to fall off.

  As an addendum to this portion of this list, I already grease the trucks and other yard equipment, I listen to your complaints and write them down on a list that never ever ends, and when the driver messes something up it's usually ME that gets the wrath of shit that comes along with it.  I typically work upwards of 65 hours per week over five or six days, and I make NO OVERTIME at that.  I am apparently on call every. single. day. Since my service truck is a piece of shit with no inspection, I used to use my personal truck to get the job done, but after watching the boss' friend and his son fuel up out of the on site fuel tank, yeah that does not happen anymore.  I have to schedule all vehicle services be they on or off site, and I have to work around some of the worst people when it comes to communicating with each other.  I am usually one of the first people there in the morning, and usually one of the last people that gets to go home.  Seriously, stop whining about what is expected of YOU.

9.)Stop standing over me.
  When I am working on something, no matter what it is, I do not need you standing there watching my every move.  When you insist on doing this, you do so at your own peril.  This is especially true when I am welding, grinding, using any power tools, or just turning a wrench.  My rule of thumb is that if I swing my arm out with whatever tool in my hand, and I can touch you, you are too close. 
I will also on rare occasions need to get out of the way of the falling machine or the fire that just started, and if you are in the way, you are going along for the ride.

 Think of it this way: when you take your car in for service that service station sure as hell will NOT allow you to stand in the repair bay watching the mechanics every move.  There are insurance regulations and laws that say you cannot do that.  I am not trying to be mean here, I just don't want you getting hurt because you were watching me weld something or sharpen something, and flying metal shit gets in your eyes.  At the very least, wear personal protective equipment that YOU provide.

10.)Let me do the job I was hired to do.
  When I was hired into the position of mechanic, I was tasked with keeping the (somewhat beat up) fleet working.  This means I have to service the trucks in a timely manner, correct the previous screw ups, be they by manufacturer or previous mechanic, order parts and run around like a headless chicken.  This is not exactly a fun job, but it is a job.  It is MY job.
 You, the layperson, do not generally get any say in what happens and when.  You do not get to tell me how to do my job, and you do not get to complain about how long it takes.  When I do a time quote, it is generally quoted a couple hours over what it actually takes, and this is because whenever I am under something, someone feels the need to call with some so called emergency that ends up being nothing by the time I get there.


Sunday, March 22, 2015

The Fleet's 2000 F250 has serious leaking problems and driveability concerns...

....and I am going to fix it all...maybe.

The same truck featured in my inspection guide has, since the time of inspection, developed a rash of drivability concerns and oil leaks from several hard to reach spots throughout the engine.  Since we finally got to a point at work where we did not have almost every truck going out every day of the week (what you call "winter") I was finally able to get it into the shop.  What started out as a simple oil leak fix quickly became an ever growing list of problems with one vehicle.  Standard fare for the company I work for.

The problems were as follows when it was all tallied up:
-The upstream oxygen sensors were not getting readings.
-The right valve cover was leaking profusely.
-The oil pan gasket had failed.
-The dipstick tube had broken off against the oil pan.
-The transmission cooler lines were damaged when the engine slipped off the jack.
-The oil cooler lines were starting to rot apart.


As you might be able to tell by the picture above, the first thing you have to do when you start a procedure such as oil pan gasket replacement is take a whole bunch of parts off of the engine.  I started with the air intake ducting, filter, and airflow sensor.  You then start the process of draining the antifreeze from the block, accomplished by opening the drain valve on the lower left side of the radiator.  Make sure you have a container to catch this antifreeze, and remember that if you dispose of used fluids improperly, Captain Planet will personally fly over and punch you in the face.


Once the antifreeze has drained to the point that it is not visible in the degas bottle, I removed the upper radiator hose and the fan shroud. After the draining antifreeze slowed to a trickle (telling me there was not much left) I removed the degas bottle, the lines attached to it, and the EVAP module and assorted lines and wires.  I also removed the throttle body from the engine, along with the IAC valve that is attached to the throttle body.
 
My next step was to remove the "Y" pipe from the truck, which is required for removing the oil pan.  After removing this pipe I allowed the oil to drain from the block, and since this pipe is out, I sprayed the sensors with penetrating oil, cut the wires, and removed the oxygen sensors with a 7/8" box end wrench, as shown below.


So far I have a small collection of parts here, including the "Y" pipe with the new oxygen sensors, throttle body, air intake ducting and filter, and the right hand valve cover (because its gasket is also being replaced.
 
 
The 5.4 triton uses a single throttle body roughly 62mm in diameter.  This particular piece looks to have never been cleaned out. When the throttle body is dirty like this, problems, from erratic idle to a no start condition can occur.  It is best to use a product labeled as a throttle body and air intake cleaner to get rid of the mess.  Also, remove the IAC and clean the inside of it as well, paying particular attention to the plunger that is inside it.  If that plunger gets too dirty, it will not work and that is what generally causes your no start condition.


Here it as all cleaned up. Setting this aside, I went ahead and continued with the operation of removing the oil pan.  At this point I need to lift the engine up about three or four inches so that the oil pan will clear the engine cross member, and even at that it will clear just barely. 
 
I first removed the front wheels so that I could get better access to the engine mount bolts.  I should point out that it is not necessary to remove the mounts from the engine block itself, but you will want as much access as you can possibly get to make things as easy as possible. There are two nuts that you will need to remove on both sides of the cross member. You also need to remove the bolts from the transmission cross member on the bottom.  


I am using a 12 ton jack with wood blocks (6X6 cut to about 10 inch pieces above and below the jack) to lift the engine up by the oil pan.  As noted my first attempt, the jack slipped and the engine came back down onto the cross member, which cracked the transmission cooler lines.  I lifted it again, and then supported the engine in this case by placing sufficient 2X4 pieces of wood, cut into one foot sections, to take up the space between the engine block and cross member.  I then lowered the block into place (not too much) and started the process of removing the oil pan.  Get the jack out of the way and get started.

This is the picture from the manual I was using (printed without permission). You need to remove the bolts in reverse order (start with number 16 and work backwards) or you will never get the pan off.   Once all the bolts are removed, remove the inspection cover on the transmission (someone already did that and chose not to reinstall it) and dislodge the oil pan. Use a soft faced dead blow hammer or a hammer and a block of wood to dislodge the pan if it refuses to cooperate with you. Now you need to remove the oil pick up tube, which has two 8mm bolts holding it in place at the oil pump and one 10mm bolt towards the back of the pan, the latter item the manual failed to mention.  Let the pick up tube fall into the pan, and now the pan can be finessed off of the engine block.
 
Above, I finally got the oil pan off the truck, and I am giving my regards to whoever engineered this pile of shit.


Here is the new oil pan gasket in place on the oil pan. The new gasket has tabs that hold it in place for reassembly, and they seem to work fairly well.
 
When your oil dipstick tube manages to get rusted to the point that it breaks off one day, that's a pretty bad thing.  In this case since I had the oil pan off and previous attempts to remove it from the outside failed miserably, I used a hammer and a drift to knock the broken thing out of the block. When the new tube was installed, I made sure that the "O" ring was seated into the block.  Otherwise I will be doing this job again very soon.
 
While I was in there I noticed that the oil cooler lines were covered in oil, and as we all know, oil rots rubber.  I went ahead and removed the oil cooler, and found all this crap lodged in it. I cleaned that up, and went ahead and replaced the oil cooler lines while I was at it.
 
Once I had the oil cooler installed, I placed the oil pick up tube back in the oil pan and went about bolting it all back together.  Once the pan was installed, I lowered the engine back onto the  cross member,  bolted up the "Y" pipe and went about reinstalling the nuts from the engine mounts and transmission cross member.  The wheels were reinstalled at this time, and now on to the next item, the valve cover gasket.
 
You need to remove the EVAP module and lines, a coolant line that someone decided should run right across the valve cover, and disconnect the ignition coils and fuel injector electrical connections before you start. Then remove the wiring harness that is retained by the valve cover bolts.
 
There is no good reference that I could find on how this gasket is supposed to go together on the internet...ok there is now. After you remove the valve cover, a task where once again Ford decided to not give you any room to work, you need to clean away any old gasket material that you find, and there should be a little on either side towards the front of the engine.
 
Second, you have 14 bolts that are supposed to stay with the valve cover...mine didn't.  In your gasket replacement kit you will have these grommets.  Assemble the grommets onto the bolts so that they are between the washers that are permanently attached to the bolts.


Third, clean your groove out in the valve cover with brake parts cleaner, add some gasket adhesive to the entire groove, place your gasket into the groove.  Now find a flat surface to set the valve cover on and let that adhesive dry.  You want to do this because the gasket has a nasty habit of catching the rear sprocket for the overhead cam during reassembly, and if this happens, you will have oil leaking out, and you will have to repeat this process.
 
 
Fourth, now that the adhesive has dried out, you need to install the bolts into the valve cover.  You do this by pushing the bolt into the hole, and using a BLUNT NOT SHARP tool, slip the valve cover gasket under the washer as shown below.
 
 
You may now install the valve cover.
 
Finally, ordinarily I would have gone ahead and replaced the transmission cooler lines when the block was lifted, but since I did not, I elected to replace them with the engine in place.  For this vehicle, there are two different lines, the first one was all steel that has a provision to clamp a rubber line onto it towards the radiator.  This one was easy.  The second one is two steel sections with a rubber line towards the front of the engine.  I decided to cut the rubber line towards the end of the smaller section of steel and install a hose barb and two clamps, as shown.  Don't worry the line pressure is less than a garden hose and far less than an air compressor, which is what this hose barb was made for.
 
 
Once this is completed, reinstall the throttle body, coolant lines, degas tank, shroud, and air ducting in the reverse order that it was removed.  Fill the cooling system and add the oil to the engine.
 
 
Since you took the oil pick up tube off, you will need to make very sure that the oil pump is primed.  To do this, go ahead and disable the fuel pump by disconnecting the switch hidden behind the passenger side kick panel or pull the fuel pump fuse/relay.  Crank the engine for no longer than 15 seconds at a time, with 15 seconds minimum between attempts.  When the oil gauge shows pressure, the engine is primed. Enable the fuel pump, start the engine, and check for leaks.
 
 
Other items I tackled when I had the truck in my shop were an oil change, greasing any grease fittings on the front suspension and universal joints, and checking the differentials (front and rear) to make sure they had enough fluid in them.  Something I did not show the process for here is during one of the first ice storms of the winter season, the automatic shifter assembly in another ford truck decided to break and so I took the assembly out of this truck and installed it into the other truck.  Big pain in the ass but when you have people that slam the shifter into gear, then you should expect to have to do this at some point.


Monday, December 8, 2014

It's Snow tire time!!!

With winter rapidly approaching and along with that snow and ice and other cold white shit the order was handed down to install the snow tires onto the Jetta, even though this vehicle is not farm equipment in any way, shape or form.  Ok so I decided to write up an overview of how to do this and do it the right way.

You will need the following tools to do this task:
-Suitable jack.
-Impact wrench  and appropriate socket or suitable tire tool, like the one that came with the vehicle.
-Torque wrench to make sure the lug nuts are tight enough.
-Source of compressed air, or a tire pump capable of making the required pressure for the tire.
-Tire pressure gauge.

First let's look at the tires, in this case a set of yokohama tires and a set of blizzak snow tires...
All seasons on the left, snow on the right.
 
 
Both of them are directional tires, meaning they are intended to roll in one direction. To mount them the wrong way would be to have driveability concerns, such as possible poor handling and traction.
 
Snow tires in the past generally had studs mounted into them that protruded from the tire itself.  These were only a good option, in my opinion, when you could not run the risk of installing tire chains on your vehicle, such as any front wheel drive car for fear of them coming loose and tearing out the half shafts.  A number of years ago Japan decided to ban studded tires from their roads for whatever reason, so the race to make snow tires without studding them was on.


The new generation of snow tire no longer uses studs for increased traction.  If you look closely at the above tire, you can see that there are grooves cut into the tread blocks.  Those grooves are called sipes, and their purpose is to trap snow in them.

Wait, what? Trap snow? I thought these tires were for increased traction on snow covered roads?  The idea here is that nothing sticks to ice and snow, quite like ice and snow.  This is where the increased traction comes into play.  The sipes gather snow and use that to help you stick to the road, though frankly, nothing is going to help you stick to the road if you insist on driving like an idiot. Think about it for a minute: Snow and ice is slippery yet you can build a snowman out of snow. You can do this because snow has a tendency to stick to itself.

Ok, so now that you have read how studless snow tires work, now let's go over how to get them (or any other tires) on the car.


First, using your tire tool loosen the lugs on one wheel (but do not remove them at this time), then jack the car up using a suitable jacking point (check your owners manual) and then, using the tire tool or impact wrench, remove the wheel and then install the snow tire, making sure to check the marked rotation of said tire. Do this four times. 


Second, once all the tires are properly mounted, you use the torque wrench to make sure the lug nuts are tight enough so that the tire is not going to come off the vehicle.  Admire your work if you must, but you are not done yet.  These settings can generally be found in the owner's manual.


And this is a click type torque wrench.
 
 
Considering that the snow tires were in storage for at least nine months, the pressure may have dropped from what it should be.  Your next task is to check the pressure in the tires and adjust it accordingly.  The pressure settings are mandated by the Federal DOT to be on a tire placard located in the doorjamb of the driver's door. NEVER inflate to what the maximum pressure is on the sidewall unless the tire placard tells you to do so.  Frankly, the number of people that do this is more than you might think and overinflating your tires will do is adversely affect your handling, tire life, and possibly brake operation.


Friday, August 15, 2014

Used car overview and repairs

So I think in everyone's life at some point everyone buys a used car.  This is how this 2002 Buick Rendezvous came to be part of the fleet I take care of.  It had been owned previously by an older gentleman that had recently passed away, so the boss decided to buy it for his kid.

Like most cars owned by older people (or most of the cars I have owned) it looks like it was used as a grocery getter, A to B car, kid hauler, part time truck and a battering ram.  It would also appear that someone had decided to try to park against something that left scratches and would not move easily, making creases in the body panels and in the ton of plastic that sits below the metal panels.
This is the Buick Rendezvous...
 
 
So since my job is making the vehicles in the fleet all work well (and look better than they should for being used as weapons in parking wars at the local mall) I am asked almost on a daily basis about this car.  The one item I do not have pictures of is the scratch/crease going down the passenger side. Long story short, I ended up painting over the scratch and buffing the living shit out of it until said scratch was presentable. Not gone, but presentable.  So, here we go on another whirlwind adventure of fixing someone's car other than my own.
 
Job one: Check out the ABS sensors.
An illuminated ABS or ANTI-LOCK lamp is not going to fail your car for state inspection (and if you read this blog you would know this) but it is something that can be a little unsettling. Just so there is no confusion, if the ABS light is lit up in your car, this does not mean your brakes do not work.  What it means is that the anti-lock braking system has an issue that may prevent it from working correctly. My little code reader does not do ABS, but I do know that the sensors can pick up metal shit off of the brake rotors and that shit can muffle or block the signal from reaching the computer, so I remove the tires in the back of the car to check them out...
That is one damn ugly wheel...
 
...and one damn rusty rotor hat.
 
So I had to take the caliper and rotor off of both sides to check them out.  Now, there is a directive here, and that directive is to make this thing look less like a turd.  See the rust there above the rotor? That needed to go so I taped off the surrounding cladding.  That alone not making a difference I got out some flat black spray paint the boss had in his shop to improve things a bit.


There...a little better...
 
I ended up doing this to all four wheel wells.  I also painted the front coil springs and visible frame/engine cradle.  Here's a hint: What you do to one side, do to the other, or it messes up the entire job.  If this was my vehicle, those rotor hats would have been cleaned up and painted too, but I have machines to fix that make the company money, and I have been screwing around with this damn thing too long as it is. 
 
 Job two: refinish the wheels.
So while the wheel wells were drying those wheels are sitting there looking like absolute crap. Here is another hint: if nothing else hose your wheels off at least once a week to remove brake pad dust.  That dust is surprisingly corrosive.  First I get out a scotchbrite pad and soapy water, then I clean as much brake dust as I can off of the wheels. Then after the soap and water cleaning I take some 150 grit sandpaper and sand down any rough spots where the brake dust just sat there for most of the life of the car.
Ugh...dirty rims
 
 
Repeating this exercise four times left me with wheels that were virtually dust free but pretty beat up looking.  This of course means it is time once again to raid the boss's paint cabinet in search of more paint appropriate for a wheel. After masking off the tire valve stems I am left with what to use to mask off the tire, as I really don't want to paint anything rubber.
 
There is an interesting method that I have seen out there for masking off the tire portion of a wheel.  You get yourself some dollar store index cards and place them between the rubber and the rim, as shown in this picture...


So now, if you take your time, you too can refinish your wheels.  Just make sure that you take your time, and by that I mean apply two or three light coats, instead of one heavy coat that will run and drip and look like shit.  These need to dry, or "cure" for at least 24 hours before reinstallation, which gives me time to look over more of the car and decide to tackle another issue...
 
Job Three: Refinish the stupid hubcap things.
 
A word about this style of hubcap...they suck.  They are made out of plastic, like half of the rest of the heap, they damage easily, and you have to use special paint to refinish them.  In my case I used dupli-color silver wheel coating and the clear coat that works with it to achieve the best possible finish, since again I am not spending a ton of time on this task.
 
I started by scrubbing off as much brake dust as I possibly could, and then I found that the hubcaps were all jacked up by the brake dust to the point that if there were any question about whether or not they were plastic, there is no question now, as many parts were devoid of any sort of paint.
 
Any loose paint chips were removed by the scotchbrite pad and elbow grease.  After drying the hubcaps off (compressed air helps tremendously with this particular task) two or three light coats of the silver, followed by the clear coat, make the caps look more presentable.


You can see that I have the cap over a trash can, and that no masking is really needed.
 
I found some wire hooks that work great to hang these up while they cure for the next week.
Don't forget to paint your nuts while you are at it...and have at it with the nut comments...
 
For the plastic (or real) lug nuts you want to do the two or three light coat routine but make sure you come in from four directions for even coverage. You don't want your nuts to be two tone, do you?
 
So while I am waiting for the next week to pass there is yet another item that needs some attention.  In this modern age of plastic cars, you have plastic headlamps.  These have a tendency to turn yellow over time and look horrible, not to mention this yellow condition will reduce the intensity of the lights and not allow everything to be seen at night.
 
Job Four: restore the headlamps to a more white condition, because it's another item on the list.
 
No self respecting person who has access to a family mechanic is going to want to drive around with yellow headlamps.  So I called napa and they sent over some so called headlamp restoring pads that are used with a cordless drill.   Save your money on that.  If you want to do it right, get some 2000 grit sandpaper, a buffer, some plastic polish (high quality name brand stuff, not off brand shit made with toothpaste and rat turds) and a spray bottle.
 
Wet down the headlamp and start sanding that yellow funk off.  Be forewarned that this will take some time.  Once the lamps are clear, use the buffer and the plastic polish to shine up the lenses.


Here is the finished result...it is still a buick...
 
Job Five: Wash and wax.
 
Since I am going to do a post later on down the line on waxing a car I am not going to bore you with the details here.  What I will say is that with the headlight polishing, bird droppings and stuff used to make other parts look good, I kind of felt bad not washing it...and waxing it...and making this 12 year old car look as good as possible.