Those that follow me on the facebook probably know that my Durango did not quite pass the inspection mandated annually by the state. The state does not require that the shop that does the inspection do the work, but they do require that the facility give you a written list of what is wrong and you typically have between 14 and 30 days to make the corrections. Of course there is an estimate of how much it will cost to make corrections, and it reads to a total of $1281.75.
First item: wiper blades.
Their cost (including labor) $41.98
My cost $18.00
SAVINGS:$23.98
Wiper blades are one of the easiest things to do, as the vast majority of them snap in and out. Considering I replaced mine about two weeks before the inspection I think this is just extra money in their pocket.
Second item: Front shocks (both)
Their cost (including labor) $219.98
My cost $55.98
SAVINGS:$164 Running savings: $182
The labor per hour at Firestone is $106.00, which tells me that their shocks are $56.99 each. My shocks (Monroe gas-a-matic) are $27.99 each and it took me less than 30 minutes to install them both. Don't get me wrong, I know it costs money to operate a shop, which is why labor rates are what they are.
Third item: right rear tire replacement.
Their cost $152.40
My cost $161.98
SAVINGS:$-9.58 Running savings $172.42
Ok so I spent a little more on this than Firestone's price, but then again they wanted to replace my brand new wiper blades at a cost of $41.98. I was able to get my tire replaced the same day by a tire outfit down the street from my job which helped out tremendously.
Fourth item: Front driveshaft reinstallation
Their cost (including labor) $697.59
My cost $30 (for replacement shaft to transfer case bolts)
SAVINGS $667.59 Running savings $840.01
I had removed the front shaft to make the broken transfer case last a little longer, and frankly had not gotten around to reinstalling the shaft. That being said, the vehicle does not require a front shaft to pass inspection, as the law states that the vehicle must be able to move forward and backward. The presence or absence of the front shaft does not affect this.
Fifth item: Right front side marker lamp lens assembly.
Their cost: undetermined
My cost: $26.83, including shipping
Firestone was not able to give me a price for this job because they could not look it up, however, I can presume that they would at the least charge me for the factory part, whether or not I actually got the factory part.
The part I got from parts geek is a reproduction part admittedly. It does fit, however, and it does work. My biggest problem with having to replace this is where it was broken there is no bulb to damage or burn out. No matter because the truck looks better with the new part.
So, the total cost of doing this myself is $262.79. This alone is a savings of just over $1000.
If I were to do this for someone else, there would be $300 in labor at $60 per hour, which while I do not have a shop, I do feel that my time is worth something.
With this, there is something to be said about being able to do at least some of your own maintenance and repair on your vehicle. Don't get me wrong, there are some that do not know how, or are uncomfortable doing this sort of work, or maybe they or you just don't want to do it. This is all fine and good, but to save yourself money, in this case substantial money, this is a good start.
Sunday, April 10, 2016

Saturday, April 9, 2016
Shocking, isn't it? (Shock install tutorial)
(Warning: contains locker room language)
So one of the items that supposedly did not pass the state safety inspection were the front shocks. The place that did the inspection wanted around $220.00 to install new shocks up front, but you know what? That's a bunch of bullshit considering they are under the impression that it takes one hour to install them both.
So, I did it myself.
Step one: get the front of the vehicle off of the ground so that the front tires do not touch the ground.



So one of the items that supposedly did not pass the state safety inspection were the front shocks. The place that did the inspection wanted around $220.00 to install new shocks up front, but you know what? That's a bunch of bullshit considering they are under the impression that it takes one hour to install them both.
So, I did it myself.
Step one: get the front of the vehicle off of the ground so that the front tires do not touch the ground.

See this thing? Remove it.
Once you have the wheel off you will be looking at the brakes and suspension components that live there behind the wheel.

See that thing in the center? That's the shock absorber.
The factory manual I picked up insists that you can use locking pliers or the flats of a wrench (hint; it's a 1/4 inch wrench) to hold the top of the shock in place while you loosen the nut, but it was not working for me and nobody has time for that shit anyway, so I used a cut off wheel to cut the nut and the upper rod off. Just go at a 45 degree angle and use a hammer to break the piece off. Fair warning: See that hose toward the top? That's your brake line, so if you are not careful you can cut that too, and that will suck.

Cut off wheel to the rescue! Note the not cut brake line...
So at the bottom of the shock there is a 18 millimeter bolt that securers the lower part of the shock to the lower control arm. Use a 18 millimeter socket and impact gun or ratchet to remove it. Then pull the shock out of the upper control arm and out of the vehicle. It is important to violently toss the old shock into the garbage can at this stage.

New shock...
This is a Monroe Gas-A-Matic shock and the supplied hardware kit that comes with it in a convenient little bag which I tore open and tossed to the side, which incidentally is also important to this being a success. You probably want to make sure you have all this stuff before you cut off your old shock, though...driving without shocks is going to be really difficult. There should be a shock, two rubber isolators, two metal end caps, and one 9/16" nut in my case.
The purpose of the shock absorbers is, besides absorbing shock, to control the up and down motion of the suspension on your car. In effect, they act as a sort of motion limiter and they dampen the movement of your suspension as you drive down the road. If you tried to drive without them, you would be bouncing up and down so badly that your tires would most likely come off the pavement and this is never a good thing, unless you are the Duke Boys or have one of those stupid cars with the hydraulic shit that makes your car hop and jump.
Have all your parts? Good! Let's get them installed!
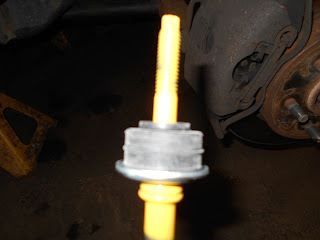
Look at this picture very carefully, important plot point here.
You need to slide one of the end caps and one of the rubber bushings over the top of the shock as shown in that order. Then, only after this is completed, you need to compress the shock (you can actually do this by hand, believe it or not...not so much with a strut) and place the shock into the area between the control arms where it came out of. The top of the shock will start going up very quickly so while it is doing that, get the 18 millimeter bolt and place it into the bottom of the shock and then thread it into the mounting point where you unbolted it from.

The bolt goes into the bottom of the shock and into the mounting hole, like this.
You might have noticed that there is a hole for the top of the shock to go into. As it raises up make sure that it is centered in this hole. The bushing will help to center it and you should be able to move it a little if it is not quite there. Place a rubber bushing and metal end cap-in that order- over the shock rod. Now is the time to install the nut. In my case, since this was a new shock and not the old one I could use a 1/4 inch wrench on the flat sides of the top of the rod and a 9/16 inch wrench to tighten down the nut.
For my application, your torque settings are as follows:
Top nut: 19 ft/lbs.
Bottom bolt: 80 ft/lbs.
For your application: LOOK IT UP!
Repeat for the other side.
When you are done, it is extremely important to yell "FUCK FIRESTONE!" because if you did this right, you spent maybe a half hour total of your time and only $55 to $60 of your money, which is way cheaper than $220.
And now you have new shocks installed...
...fuck firestone.
DISCLAIMER: Don't come bitching to me if you yell "FUCK FIRESTONE!" and get in trouble, especially if you are doing this in your parent's garage or at work where in my case the mean mechanic that paid tons of money for his shit will not let you borrow his tools because he doesn't know you and thinks you look like a crackhead.
Sunday, March 27, 2016
It's transfer case time!
Yep, you read that right. I am finally going to replace the transfer case in the "new" truck and get rid of the noise that it is making while going down the road. It has been an interesting time trying to get this completed, however. In between potential snow storms, work being work, and vendors not getting their shit together to get me the parts when promised it has been difficult at best.

Transfer cases bolt on to the back end of your transmission and are driven by said transmission to turn a driveshaft that is connected to the front differential. They are found in trucks (and cars) that are either four wheel drive or all wheel drive. A four wheel drive vehicle has a part time transfer case, which means that you have to engage the case via a lever or electric motor. All wheel drive vehicles have a full time transfer case, which means that the wheels all are driven all the time. A good example of a vehicle with a full time transfer case is the Subaru WRX. In the case of some all wheel drive vehicles, there is an option to select a low range, high range, etc.
So once I climbed under the truck to discover what was making all the noise I found a huge crack in my case, which means there is likely to be no oil in it. A new case would cost somewhere in the neighborhood of $1200, so I went to Al's auto parts (www.alsautopa.com) to see if they had one. It turns out they did, and in my case it's out of a 2001 Dodge Dakota that had 61,000 miles on it. Al's auto is most likely the most organized salvage yard I have ever been to, and for the low price of $265.00, I had a replacement transfer case, removed from the donor vehicle, drained of oil and ready to go.
As a precautionary step I had removed the front driveshaft from the truck to cut down noise and counter rotation. In the process of doing that I had to cut two of the bolt heads off of the back of the shaft, and use an extractor on the rest. This action necessitates replacing those bolts, which led me to go to Reedman Toll Dodge (reedmantollchryslerdodgejeepram.com). Here is some advice for you: get your own part numbers and insist that those part numbers are the ones that you get. In my case, it took half an hour for the parts counter kid to get motivated, go get the wrong bolts, go get the right bolts, ring me out, get the credit card machine to work, get me a receipt...well, let's just say I won't be going back there unless I have the whole day off for getting factory parts.
Now that I have what I need, it's time to get started. To do this job properly, you will need the following tools:
After this is done you will want to get the truck in the air, enough so you can get under it and work. Raise the truck as high as you can safely do so. Place the transmission in neutral and remove the front and rear drive shafts. Return the transmission to park.
Use the floor jack and a piece of wood, long enough to cover the width of the transmission pan, to support the transmission under the pan and remove the cross member. There are four nuts in the center that hold the transmission on to the cross member that should be removed first. Use a 1/4 inch drive 13mm socket as there is not a lot of space to get any tool in there. There are four bolts on each side of the cross member that need to be removed. The cross member is not too heavy (maybe 30 pounds) so you should be able to get it out without the use of a floor jack.


Here is the "new" transfer case, waiting to go into its new home.
Transfer cases bolt on to the back end of your transmission and are driven by said transmission to turn a driveshaft that is connected to the front differential. They are found in trucks (and cars) that are either four wheel drive or all wheel drive. A four wheel drive vehicle has a part time transfer case, which means that you have to engage the case via a lever or electric motor. All wheel drive vehicles have a full time transfer case, which means that the wheels all are driven all the time. A good example of a vehicle with a full time transfer case is the Subaru WRX. In the case of some all wheel drive vehicles, there is an option to select a low range, high range, etc.
So once I climbed under the truck to discover what was making all the noise I found a huge crack in my case, which means there is likely to be no oil in it. A new case would cost somewhere in the neighborhood of $1200, so I went to Al's auto parts (www.alsautopa.com) to see if they had one. It turns out they did, and in my case it's out of a 2001 Dodge Dakota that had 61,000 miles on it. Al's auto is most likely the most organized salvage yard I have ever been to, and for the low price of $265.00, I had a replacement transfer case, removed from the donor vehicle, drained of oil and ready to go.
As a precautionary step I had removed the front driveshaft from the truck to cut down noise and counter rotation. In the process of doing that I had to cut two of the bolt heads off of the back of the shaft, and use an extractor on the rest. This action necessitates replacing those bolts, which led me to go to Reedman Toll Dodge (reedmantollchryslerdodgejeepram.com). Here is some advice for you: get your own part numbers and insist that those part numbers are the ones that you get. In my case, it took half an hour for the parts counter kid to get motivated, go get the wrong bolts, go get the right bolts, ring me out, get the credit card machine to work, get me a receipt...well, let's just say I won't be going back there unless I have the whole day off for getting factory parts.
Now that I have what I need, it's time to get started. To do this job properly, you will need the following tools:
- Floor jack
- Jack stands (2 minimum, 4 optimal)
- Transmission jack (STRONGLY recommended)
- Impact wrench
- Sockets
- About 7 hours of time
Use penetrating oil and soak the front driveshaft bolts at the transfer case liberally. Allow them to soak for awhile. Soak them overnight if at all possible.
After this is done you will want to get the truck in the air, enough so you can get under it and work. Raise the truck as high as you can safely do so. Place the transmission in neutral and remove the front and rear drive shafts. Return the transmission to park.
Use the floor jack and a piece of wood, long enough to cover the width of the transmission pan, to support the transmission under the pan and remove the cross member. There are four nuts in the center that hold the transmission on to the cross member that should be removed first. Use a 1/4 inch drive 13mm socket as there is not a lot of space to get any tool in there. There are four bolts on each side of the cross member that need to be removed. The cross member is not too heavy (maybe 30 pounds) so you should be able to get it out without the use of a floor jack.

Here are the front (top) and rear (bottom) drive shafts.
 Here you see the transmission being supported by the floor jack. I should have used a piece of wood to support it a little better.
Drain the oil out of the existing transfer case, then disconnect the shift motor, actuator motor, and vacuum line from the transfer case.
Remove the transmission mount and set it aside with its bolts. There is a mounting plate above the transmission mount, which is also removed and set aside with its bolts.

This next step is optional and should be avoided if at all possible: I removed the "Y" pipe for the exhaust. If you choose to do this you need to soak the flange bolts at the exhaust manifolds with penetrating oil. Be forewarned that I snapped off all four bolts doing this and in my case they will have to be replaced.
Author's note: it was my intention to take more pictures but at the time I was having a very hard time getting the last nut off of the case, so this is the end of the pictures.
There are six nuts that hold the transfer case to the transmission. Two on the bottom that were hiding above the transmission mount. Two on the driver's side that are fairly easy to remove. The last two are on the top and are a bit harder.
There is one on the passenger's side hidden by a heat shield that is held on by two bolts. Remove the heat shield to get at this nut.
The nut on the top can be accessed by lowering the transmission a maximum of two inches. Using a "shorty" wrench and, in my case, a ball joint removal tool and hammer to break it loose, it can be accessed and removed. It's tight, but it can be done.
Position the transmission jack under the transfer case and carefully slide the case backwards off the transmission. WARNING: THIS IS ABOUT A 70 POUND PART AND IF IT HITS YOU CAN CAUSE SERIOUS INJURY. Carefully lower the jack and transfer case, then remove it from the work area.
To install the new case, place it on the transmission jack and raise the case until you can rotate the tail shaft extender over the welded in cross member. Then carefully line up the shaft on the transfer case with the tail shaft on the transmission and the holes where the studs on the transfer case go through. This will take a few attempts. You can spin the shaft on the transfer case to line it up with the tail shaft on the transmission. When the shafts are engaging each other you will not be able to spin the shaft. Carefully slide the case forward, until it is snug against the transmission. Leave the transmission jack in place to support the transfer case.
Starting with the top nut, install the nuts to the transfer case studs. Tighten them to 26 ft/lbs. Install the heat shield on the passenger side of the transmission once that particular nut is back in place.
Raise the transmission back up to stock height and install the transmission mount bracket, then the transmission mount.
If you removed the "Y" pipe, reinstall it at this time.
Starting with the center nuts, reinstall the cross member. Use the floor jack to raise or lower the transmission to center the bolt holes on either side of the cross member. Use an impact wrench to get these bolts in.
At this time, you need to add ATF to the transfer case. Using a 3/8" allen key, remove the fill plug and add ATF until it starts coming out of the fill plug hole. You will also want to make sure the drain plug (which looks just like the fill plug but it is lower on the case) is tightened up.
Reinstall the rear driveshaft. The front slides into the tail shaft extender and the rear is bolted into place. The front shaft can be collapsed slightly. Bolt the front drive shaft to the transfer case flange first, then bolt the front of the drive shaft to the front differential.
Lastly, lower the truck to the ground, start the truck and check for leaks. Test drive the vehicle and check for leaks again. Lastly, engage the four wheel drive mechanism. Listen for the motor to engage the transfer case.

Drain the oil out of the existing transfer case, then disconnect the shift motor, actuator motor, and vacuum line from the transfer case.
Remove the transmission mount and set it aside with its bolts. There is a mounting plate above the transmission mount, which is also removed and set aside with its bolts.

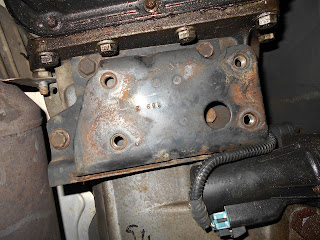
The transmission mount proper...

...and the bracket that it bolts to. Your first two nuts are hidden under this.
This next step is optional and should be avoided if at all possible: I removed the "Y" pipe for the exhaust. If you choose to do this you need to soak the flange bolts at the exhaust manifolds with penetrating oil. Be forewarned that I snapped off all four bolts doing this and in my case they will have to be replaced.
Author's note: it was my intention to take more pictures but at the time I was having a very hard time getting the last nut off of the case, so this is the end of the pictures.
There are six nuts that hold the transfer case to the transmission. Two on the bottom that were hiding above the transmission mount. Two on the driver's side that are fairly easy to remove. The last two are on the top and are a bit harder.
There is one on the passenger's side hidden by a heat shield that is held on by two bolts. Remove the heat shield to get at this nut.
The nut on the top can be accessed by lowering the transmission a maximum of two inches. Using a "shorty" wrench and, in my case, a ball joint removal tool and hammer to break it loose, it can be accessed and removed. It's tight, but it can be done.
Position the transmission jack under the transfer case and carefully slide the case backwards off the transmission. WARNING: THIS IS ABOUT A 70 POUND PART AND IF IT HITS YOU CAN CAUSE SERIOUS INJURY. Carefully lower the jack and transfer case, then remove it from the work area.
To install the new case, place it on the transmission jack and raise the case until you can rotate the tail shaft extender over the welded in cross member. Then carefully line up the shaft on the transfer case with the tail shaft on the transmission and the holes where the studs on the transfer case go through. This will take a few attempts. You can spin the shaft on the transfer case to line it up with the tail shaft on the transmission. When the shafts are engaging each other you will not be able to spin the shaft. Carefully slide the case forward, until it is snug against the transmission. Leave the transmission jack in place to support the transfer case.
Starting with the top nut, install the nuts to the transfer case studs. Tighten them to 26 ft/lbs. Install the heat shield on the passenger side of the transmission once that particular nut is back in place.
Raise the transmission back up to stock height and install the transmission mount bracket, then the transmission mount.
If you removed the "Y" pipe, reinstall it at this time.
Starting with the center nuts, reinstall the cross member. Use the floor jack to raise or lower the transmission to center the bolt holes on either side of the cross member. Use an impact wrench to get these bolts in.
At this time, you need to add ATF to the transfer case. Using a 3/8" allen key, remove the fill plug and add ATF until it starts coming out of the fill plug hole. You will also want to make sure the drain plug (which looks just like the fill plug but it is lower on the case) is tightened up.
Reinstall the rear driveshaft. The front slides into the tail shaft extender and the rear is bolted into place. The front shaft can be collapsed slightly. Bolt the front drive shaft to the transfer case flange first, then bolt the front of the drive shaft to the front differential.
Lastly, lower the truck to the ground, start the truck and check for leaks. Test drive the vehicle and check for leaks again. Lastly, engage the four wheel drive mechanism. Listen for the motor to engage the transfer case.
Friday, March 11, 2016
The replacement truck
Like many people that are into cars and trucks or other forms of mechanized, motorized transportation, I had these dreams of making the duck a much better vehicle with some improvements and repairs down the line. Also, like many people that I just mentioned, I have found that the improvements have had to make way for the repairs. Then the emergency repairs. I decided after the bracket for the alternator/A/C compressor snapped that it was time to let it go.
What I could see happening is that I would be going to work five days a week, hoping that I would get there and then get home. I would be spending the weekends searching for the right replacement parts for a vehicle that frankly, not a lot of them were made with the four cylinder, five speed combination. I did this before with a mid 90's BMW, and after all of that it was towed to the scrapyard at the end of it all. The worst part about that? With all the hours and money being spent on something like the car in question, no time or money was left for anything else.
 This is my "new" 2001 Dodge Durango SLT. This particular model is equipped with a 4.7 liter (287 CID) V-8 engine and a four speed automatic transmission. The functionality of a truck with the comforts of a sedan, and more power. About 235 horsepower at 4200 rpm, not that I am going to rev my engine up that high...ever. It's got a tick over 135K on it, but drives and rides wonderfully.

This truck also features a four wheel drive system that is referred to commonly as "shift on the fly", which means that I don't have to stop the truck, get out of my seat, lock the hubs in, ad infitum. Instead I turn a knob on the dash and there I am in four wheel drive. Not that I spend a lot of time off roading (and frankly I would have bought a beater truck if that was my thing) but considering what I am paid for snow removal services it makes sense to be able to get there safely.
No used vehicle is without its surprises, both good and bad. One of the surprises I have already dealt with is a leaking power steering hose. It just so happens that it was the pressure line, which is a little bit of a pain in the ass to change out. At least until I realized I am replacing the entire hose assembly. Out comes the whizzer wheel (cut off tool) and out comes the old leaky hose, in with the new. No more power steering whine and no more dripping fluids all over creation.
I have third row seating, which means I can take six of my friends along for the ride to wherever. The vehicle, not having an instruction manual, left me to figure out how to get that third row to lay flat, making more cargo space. I finally got the seat bottom to pull forward, and I was greeted with this:

Here we can see that there are leaves, paper, some kids stickers, and a 7/16ths craftsman combination wrench. You don't see it in the picture, but there is some broken window glass in there as well...like the last truck. Ok so not that a through cleaning was in store for the dodge as it is but here, the "elderly parents story" is starting to not hold water. I also found five "pachislo" coins. Someone likes their slot machines, it seems.
 Continuing on I opened up the jack compartment, at the back of the truck, and found no jack. I did find part of a jack stand, a file, wire cutters and a craftsman 1/2 wrench! The bars are the handle for the jack and also how you lower the spare tire. Looks like I should get a jack for this thing...soon.
So at the end of my in depth inspection, I do have a few items that need to be addressed on the Durango, and some of them sooner than others. As mentioned earlier I have already taken care of the power steering leak. One of the front hubs requires replacement, and one of the front marker lights has a hole in it. If nothing else I can see some how to articles coming out of this.
What I could see happening is that I would be going to work five days a week, hoping that I would get there and then get home. I would be spending the weekends searching for the right replacement parts for a vehicle that frankly, not a lot of them were made with the four cylinder, five speed combination. I did this before with a mid 90's BMW, and after all of that it was towed to the scrapyard at the end of it all. The worst part about that? With all the hours and money being spent on something like the car in question, no time or money was left for anything else.
So for about a year on and off, mostly off, to be honest, I have been looking for a replacement for the truck. The requirements were more or less that it is not a ford, that it is a truck, and that it runs right. I didn't really care one way or the other about what kind of transmission it had, what color it was (except those gawd awful funky colors) or who manufactured it, as long as it wasn't made by Ford. This is what I finally found...


Here is the rear view of the Durango. Fun fact: Those tail lights are the exact same ones that are on the Dodge Caravan of the same era.
No used vehicle is without its surprises, both good and bad. One of the surprises I have already dealt with is a leaking power steering hose. It just so happens that it was the pressure line, which is a little bit of a pain in the ass to change out. At least until I realized I am replacing the entire hose assembly. Out comes the whizzer wheel (cut off tool) and out comes the old leaky hose, in with the new. No more power steering whine and no more dripping fluids all over creation.
I have third row seating, which means I can take six of my friends along for the ride to wherever. The vehicle, not having an instruction manual, left me to figure out how to get that third row to lay flat, making more cargo space. I finally got the seat bottom to pull forward, and I was greeted with this:


So at the end of my in depth inspection, I do have a few items that need to be addressed on the Durango, and some of them sooner than others. As mentioned earlier I have already taken care of the power steering leak. One of the front hubs requires replacement, and one of the front marker lights has a hole in it. If nothing else I can see some how to articles coming out of this.
Sunday, February 14, 2016
How to diagnose and replace a vaccuum pump.
This guide is being written around the ford F series light and medium duty trucks that are equipped with 6.0 and 7.3 liter turbo diesel engines or a caterpillar diesel engine (typically found in F650-F750 trucks). Other vehicles may be similar but please consult a repair manual for your application.
For this diagnosis/repair you will need:
A multimeter.
Ratchet and 10mm socket.
Long needle nose pliers.
Symptoms of a failed electrical vacuum pump in this case can include the climate control only working on defrost (this is a factory default safety system) and auto four wheel drive not working.
Step one: Find the leak.
Ford trucks equipped with diesel engines have two vacuum pumps. One is engine mounted and this is what provides vacuum for your brake assist. We are NOT dealing with this one here. What we are dealing with is an electric vacuum pump, mounted near the blower motor, that supplies vacuum for the dashboard climate controls and the four wheel drive system (if you have auto locking hubs). You will need to inspect the vacuum lines to make sure they did not come apart at some point. Fix any leaks you find.
Step two: Found a leak? Fixed it? Test your repair.
Start the engine and let it run for about 30 seconds so that the pump can build vacuum. You should go ahead and check to see if the blower can work anywhere else in the system. (Remember, defrost is the factory default.) You should also check your automatic four wheel drive hub engagement (if equipped.) Does it work now? If so, you are finished. If not...
Step three: Test the vacuum pump and connection.
If fixing the leak did not help, you need to take your multi meter and test the connection and the pump itself. The pump will be on the passenger side of the vehicle, near the blower fan. It will have a two pin pigtail connected to it. Disconnect the pig tail and turn the key on without starting the vehicle. Place one lead on to each side of the plug (it does not matter which one goes where just so that the leads are contacting the metal in the pigtail. If you get a reading, move on to the pump itself. If there is no power, you need to check the fuses and perform the test again.
If there is voltage, set the meter to check continuity, and touch one lead to each pin at the connection in the motor. You should have continuity which, in most cases, will make the meter beep. This motor is getting power whenever the key is turned, so if there is no beep, the motor has failed.
Step Four: Replace the motor.
Using a 10mm socket and ratchet, remove the two screws that hold the bracket for the vacuum pump onto the inner fender. You can now remove the pump and bracket from the vehicle. The pump is mounted to the bracket with three rubber shock absorber mounts. Pulling on the pump itself should free it from the bracket.
If the new pump comes with replacement shock absorbers, remove the old ones and install the new ones, using the needle nose pliers to pull them through. Place the pump on the bracket over the shock absorbers and use the pliers again to pull the shock absorbers through the pump mounting holes. Installation is the reverse of normal.
It was my experience last week, when I replaced three of these in a day, that the pump itself went bad in two of the cases. in one case, vacuum lines had become disconnected, which caused the pump to burn out.
Sorry, no pictures this time.
For this diagnosis/repair you will need:
A multimeter.
Ratchet and 10mm socket.
Long needle nose pliers.
Symptoms of a failed electrical vacuum pump in this case can include the climate control only working on defrost (this is a factory default safety system) and auto four wheel drive not working.
Step one: Find the leak.
Ford trucks equipped with diesel engines have two vacuum pumps. One is engine mounted and this is what provides vacuum for your brake assist. We are NOT dealing with this one here. What we are dealing with is an electric vacuum pump, mounted near the blower motor, that supplies vacuum for the dashboard climate controls and the four wheel drive system (if you have auto locking hubs). You will need to inspect the vacuum lines to make sure they did not come apart at some point. Fix any leaks you find.
Step two: Found a leak? Fixed it? Test your repair.
Start the engine and let it run for about 30 seconds so that the pump can build vacuum. You should go ahead and check to see if the blower can work anywhere else in the system. (Remember, defrost is the factory default.) You should also check your automatic four wheel drive hub engagement (if equipped.) Does it work now? If so, you are finished. If not...
Step three: Test the vacuum pump and connection.
If fixing the leak did not help, you need to take your multi meter and test the connection and the pump itself. The pump will be on the passenger side of the vehicle, near the blower fan. It will have a two pin pigtail connected to it. Disconnect the pig tail and turn the key on without starting the vehicle. Place one lead on to each side of the plug (it does not matter which one goes where just so that the leads are contacting the metal in the pigtail. If you get a reading, move on to the pump itself. If there is no power, you need to check the fuses and perform the test again.
If there is voltage, set the meter to check continuity, and touch one lead to each pin at the connection in the motor. You should have continuity which, in most cases, will make the meter beep. This motor is getting power whenever the key is turned, so if there is no beep, the motor has failed.
Step Four: Replace the motor.
Using a 10mm socket and ratchet, remove the two screws that hold the bracket for the vacuum pump onto the inner fender. You can now remove the pump and bracket from the vehicle. The pump is mounted to the bracket with three rubber shock absorber mounts. Pulling on the pump itself should free it from the bracket.
If the new pump comes with replacement shock absorbers, remove the old ones and install the new ones, using the needle nose pliers to pull them through. Place the pump on the bracket over the shock absorbers and use the pliers again to pull the shock absorbers through the pump mounting holes. Installation is the reverse of normal.
It was my experience last week, when I replaced three of these in a day, that the pump itself went bad in two of the cases. in one case, vacuum lines had become disconnected, which caused the pump to burn out.
Sorry, no pictures this time.
Sunday, January 31, 2016
Proof I made rhe right choice.
After nineteen months working for a small landscape company in Bucks County, Pennsylvania, I came to the realization that I cannot work with stupid anymore. It's painful, to say the least. The term "stupid" in this case refers to working with a group of people that are supposed to be professionals with years and years of experience that never really showed in their conduct. Using broken equipment and breaking it some more in the process, taking trucks on the road that they should not have, and when they get caught, call me to wave my magic wand to fix it (because I have all sorts of influence over local law enforcement you know). Working with a bunch of kids, that with few exceptions, just didn't get it. And my personal favorite, working with managers that were clueless with two or three exceptions.
I had begun the process of seriously looking for a new job earlier in the year, and while I did get a few offers, nothing really sparked my interest. There was a place that wanted me to work all outside on their fleet, on a part time basis. Another interesting place would have me working on anything from your average econobox to antique Volkswagens and BMWs, like an Isetta. (Remember the TV show family matters? Remember Urkel's car? That thing.)
After a long search, keeping in mind that I did not have to take the first job that made an offer to me, I finally found a place that seems to have its shit together.
I started the new job on January 4, doing the same thing (fleet maintenance) I have been doing for a few years on a full time basis now. If you have changed jobs, then you probably know about the feelings on starting that new job. Things like being worried if you made the right choice or if this move was a mistake. If this doesn't work out, then what?
I made the right choice.
The new job hired me as a mechanic/shop supervisor. When they did this, they gave me an offer letter, on their company letterhead, that spells out exactly what I am to do and exactly what my responsibilities are. This offer letter is three pages long. I was also given a copy of the handbook (rulebook for my foreign friends) to keep and refer to, should I have questions regarding policies and such. This offer letter includes items such as paid time off, health insurance and holiday pay (included in the paid time off statement.) There is room to grow in this position.
The old job, upon hearing of my intention to leave (because giving notice is the right thing to do, never burn a bridge if you can possibly avoid it) did present a counter offer. It was one page, on legal pad paper. There were four lines total. All about money, which for the record I mentioned one time. It basically read that if I were to take up residence there for 60 hours per week I could make more money. Again I mentioned money one time. This offer letter promised me one week vacation per year, which would be paid at 40 hours. A far cry short of what I would need to put in to make the promised amount per year. There is no room to grow in this position.
The old job, especially its owner/president/ski bum wouldn't even say f**k you the last week I was there, with very few exceptions. They were kind enough to leave me a list of things to do that I could not get accomplished since trucks need to sit still for that to happen.
The new job sent me an email hoping me and my family had a happy holiday. Note that this was before I started.
We had a blizzard last weekend on the east coast. Two feet of snow fell and while I was at work from Friday night to Sunday night, I was paid extra for this. Extra on top of my salary. It was too dangerous to go home (remember, two feet of snow) and I had to be back Sunday morning for more snow removal. The new job is reimbursing me for a hotel stay at a place within walking distance of the shop. I even got a $50.00 tip, if you will, directly from the owner's pocket.
No way in hell would the old job do that. While yes the old job did pay extra during snow removal (a whole two dollars per hour extra) it was only while bailing out someone stupid enough to not check their machine. I was based out of my home for these things, I was assigned a truck (an uninspected truck with multiple issues, mind you) and I could get around, but the phone calls would wake her up. With the new job, since I was there, no phone calls to wake her up. This is a good thing.
The old job has some equipment that is bordering on forty years old. The average age of a fleet vehicle, using what they define as a fleet vehicle, is 16 years old. Most of this fleet has major rust issues. In fact, I bought a pair of off road goggles just to keep the falling rust out of my eyes. They have a few tractors that frankly need lots of work to keep them going.
The new job has an average fleet vehicle age of eight years, using what they define as a fleet vehicle. The undercarriage rust is minimal, and there is someone on staff that repairs rust holes in the truck bodies. (I am nobody's paint and body man. I never have been.) I still wear my goggles but it's not like if you were to smack the truck that ten pounds of rust would fall on you.
Last but not least, yesterday the general manager sent me a text thanking me for my service this past week and wishing me rest for the upcoming week. The day before he was kind enough to look into an issue for me and get me an answer that day. The office administrator had a question about the child support paperwork earlier in the month, and instead of "winging it" called me about it, because after years of being in their system, I just might have the answer they need. The company owner has sent help to my shop to clean up trucks from the storm and help with snow blower diagnosis. Qualified help in this case.
The old job, on the other hand, would send me the owner's brother in law. They could keep him doing something else as far as I am concerned, because, as my grandfather would say, the man is about as useless as the **** on a boar hog. Questions on child support were winged at best, and I would personally like to take this opportunity to thank the old job for costing me money in the form of having to take off work to go work out the payment problem that the old job created by not sending in enough money for the first month or so I worked there.
Let us not think for a moment that I died and went to mechanic heaven, because no job is perfect. I have an assistant that can be quite the insolent little jerk. Last Friday was not a good day for me because nothing wanted to go together right and one of my bobcat loaders decided to break down on a jobsite. Earlier in the week I got to deal with Bobcat regarding some goof ass entering a password on the machine to prevent it from starting, and forgetting to tell anyone about it. Plows break down, drivers break things and destroy transfer cases, and in general it got rough at times because you never knew what to expect next. I can say that management above me and my assistant did make things easier by jumping in when needed, whether it be the assistant getting a plow going again, or the general manager getting me a phone number to call technical support.
I think it is safe to say I have had one bad day since starting the new job. As mentioned earlier this is because nothing was going right, and this is to be expected. The old job, on the other hand, caused a panic within the first two hours of my first day on the job, which should have been a huge red flag. A panic that it turned out did not have to happen, had the driver used some common sense.
Oh one last thing. I actually received a uniform allotment before I started the new job. Shirts, sweatshirts, and a now ruined hoodie, so that I did not have to ruin more of my own clothes when working on their equipment. The cycle was that I would wear older t shirts to work so that when I got grease and crap on them nobody would care, new shirts were worn and relegated to work shirt and so forth. I received a shirt only when I managed to get a diesel fuel bath while changing a fuel filter on a big ford truck.
I made the right choice.
I had begun the process of seriously looking for a new job earlier in the year, and while I did get a few offers, nothing really sparked my interest. There was a place that wanted me to work all outside on their fleet, on a part time basis. Another interesting place would have me working on anything from your average econobox to antique Volkswagens and BMWs, like an Isetta. (Remember the TV show family matters? Remember Urkel's car? That thing.)
After a long search, keeping in mind that I did not have to take the first job that made an offer to me, I finally found a place that seems to have its shit together.
I started the new job on January 4, doing the same thing (fleet maintenance) I have been doing for a few years on a full time basis now. If you have changed jobs, then you probably know about the feelings on starting that new job. Things like being worried if you made the right choice or if this move was a mistake. If this doesn't work out, then what?
I made the right choice.
The new job hired me as a mechanic/shop supervisor. When they did this, they gave me an offer letter, on their company letterhead, that spells out exactly what I am to do and exactly what my responsibilities are. This offer letter is three pages long. I was also given a copy of the handbook (rulebook for my foreign friends) to keep and refer to, should I have questions regarding policies and such. This offer letter includes items such as paid time off, health insurance and holiday pay (included in the paid time off statement.) There is room to grow in this position.
The old job, upon hearing of my intention to leave (because giving notice is the right thing to do, never burn a bridge if you can possibly avoid it) did present a counter offer. It was one page, on legal pad paper. There were four lines total. All about money, which for the record I mentioned one time. It basically read that if I were to take up residence there for 60 hours per week I could make more money. Again I mentioned money one time. This offer letter promised me one week vacation per year, which would be paid at 40 hours. A far cry short of what I would need to put in to make the promised amount per year. There is no room to grow in this position.
The old job, especially its owner/president/ski bum wouldn't even say f**k you the last week I was there, with very few exceptions. They were kind enough to leave me a list of things to do that I could not get accomplished since trucks need to sit still for that to happen.
The new job sent me an email hoping me and my family had a happy holiday. Note that this was before I started.
We had a blizzard last weekend on the east coast. Two feet of snow fell and while I was at work from Friday night to Sunday night, I was paid extra for this. Extra on top of my salary. It was too dangerous to go home (remember, two feet of snow) and I had to be back Sunday morning for more snow removal. The new job is reimbursing me for a hotel stay at a place within walking distance of the shop. I even got a $50.00 tip, if you will, directly from the owner's pocket.
No way in hell would the old job do that. While yes the old job did pay extra during snow removal (a whole two dollars per hour extra) it was only while bailing out someone stupid enough to not check their machine. I was based out of my home for these things, I was assigned a truck (an uninspected truck with multiple issues, mind you) and I could get around, but the phone calls would wake her up. With the new job, since I was there, no phone calls to wake her up. This is a good thing.
The old job has some equipment that is bordering on forty years old. The average age of a fleet vehicle, using what they define as a fleet vehicle, is 16 years old. Most of this fleet has major rust issues. In fact, I bought a pair of off road goggles just to keep the falling rust out of my eyes. They have a few tractors that frankly need lots of work to keep them going.
The new job has an average fleet vehicle age of eight years, using what they define as a fleet vehicle. The undercarriage rust is minimal, and there is someone on staff that repairs rust holes in the truck bodies. (I am nobody's paint and body man. I never have been.) I still wear my goggles but it's not like if you were to smack the truck that ten pounds of rust would fall on you.
Last but not least, yesterday the general manager sent me a text thanking me for my service this past week and wishing me rest for the upcoming week. The day before he was kind enough to look into an issue for me and get me an answer that day. The office administrator had a question about the child support paperwork earlier in the month, and instead of "winging it" called me about it, because after years of being in their system, I just might have the answer they need. The company owner has sent help to my shop to clean up trucks from the storm and help with snow blower diagnosis. Qualified help in this case.
The old job, on the other hand, would send me the owner's brother in law. They could keep him doing something else as far as I am concerned, because, as my grandfather would say, the man is about as useless as the **** on a boar hog. Questions on child support were winged at best, and I would personally like to take this opportunity to thank the old job for costing me money in the form of having to take off work to go work out the payment problem that the old job created by not sending in enough money for the first month or so I worked there.
Let us not think for a moment that I died and went to mechanic heaven, because no job is perfect. I have an assistant that can be quite the insolent little jerk. Last Friday was not a good day for me because nothing wanted to go together right and one of my bobcat loaders decided to break down on a jobsite. Earlier in the week I got to deal with Bobcat regarding some goof ass entering a password on the machine to prevent it from starting, and forgetting to tell anyone about it. Plows break down, drivers break things and destroy transfer cases, and in general it got rough at times because you never knew what to expect next. I can say that management above me and my assistant did make things easier by jumping in when needed, whether it be the assistant getting a plow going again, or the general manager getting me a phone number to call technical support.
I think it is safe to say I have had one bad day since starting the new job. As mentioned earlier this is because nothing was going right, and this is to be expected. The old job, on the other hand, caused a panic within the first two hours of my first day on the job, which should have been a huge red flag. A panic that it turned out did not have to happen, had the driver used some common sense.
Oh one last thing. I actually received a uniform allotment before I started the new job. Shirts, sweatshirts, and a now ruined hoodie, so that I did not have to ruin more of my own clothes when working on their equipment. The cycle was that I would wear older t shirts to work so that when I got grease and crap on them nobody would care, new shirts were worn and relegated to work shirt and so forth. I received a shirt only when I managed to get a diesel fuel bath while changing a fuel filter on a big ford truck.
I made the right choice.
Monday, October 26, 2015
How to fix the driveshaft you just ruined
The fleet has a 2004 F450 truck that, for having less than 90,000 miles on it, is really beat up. The problem we will discuss today revolves around trying to replace a universal joint on the left front side of the drive axle.
What happened is while trying to cut out the universal joint, I got a little crazy with the torch and cut some pretty deep gouges (for lack of a better term) into the loops where the caps on the universal joints attach. Most people would write this end of the axle off and go get a new one. I am not most people.
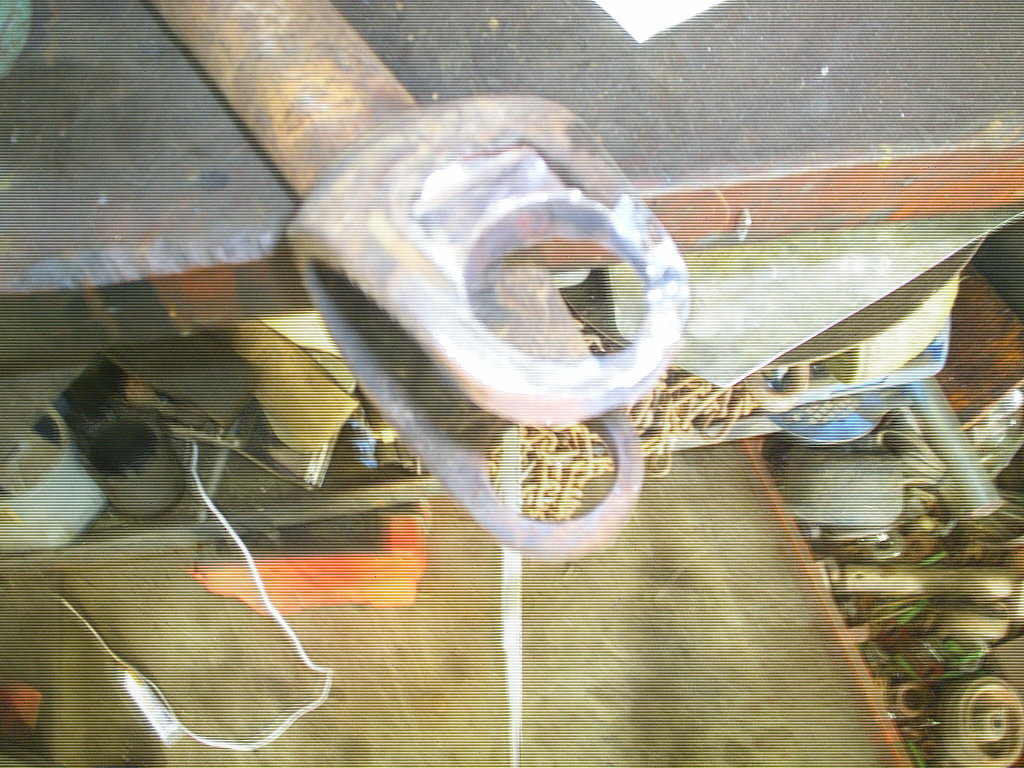
 It's hard to see in the above photo but the end of the shaft there has some very deep gouges in it due to overzealousness with a torch. Note that I managed not to burn all the way through it, which helps out in this case. The repair procedure would not be that much different, however, if I did. It would just be longer and a few extra steps would have to be taken.
The first thing I did was use a flap disc (a grinder attachment) and a roloc pad mounted on an angle grinder to clean up all the metal flash, rough edges and rust that is present on everything at work. I also cleaned up the other side so that I could get a good ground for the MIG welder I planned to use to make the part useable again.
 Here is the half shaft, cleaned up and devoid of rust. The next step is going to be to get out your MIG welder and start filling in the gouges with filler metal. Do not just weld it up all at once. If you have two or three sections, start with one, fill it partially, then move to another far away from the first. The reason behind this is that you do not want to put too much heat into one piece at one time.
Once you have filled the gouges, get your flap disc out and sand down any raised areas. You might have to fill and file a few times to get it right. Take your time. You are saving money. Significant money.
 This is after two sessions of fill and file. As you can see I still have to fill in the missing metal on the inside of the loop. In this case I aimed the MIG gun at the blank spots and used it to fill the void in until it was no more.


After about 45 minutes of work, I had not only repaired the half shaft but I had also reassembled the shaft. It is now ready to go back into the truck.
Tools used (metal repair only)
*MIG welder
*Welding mask
*Gloves
*4 1/2" grinder with flap disc installed
*2" air angle grinder with 2" green sanding pad and later small grinding stone
(Universal joint installation)
*3 pound hammer
*Socket to counter sink the end caps as needed
Points to ponder:
*This does NOT make a good first time project. You have to be honest with yourself regarding your ability to use a welder. If in doubt, seek professional assistance or farm the project out.
*Patience is a virtue when making this repair. When you rush the job, it shows. Take your time.
*Eye, ear, and hand protection are necessary when working with metal. That being said spend a few bucks on these items. Cheap stuff is not good and good stuff is not cheap.
What happened is while trying to cut out the universal joint, I got a little crazy with the torch and cut some pretty deep gouges (for lack of a better term) into the loops where the caps on the universal joints attach. Most people would write this end of the axle off and go get a new one. I am not most people.

The first thing I did was use a flap disc (a grinder attachment) and a roloc pad mounted on an angle grinder to clean up all the metal flash, rough edges and rust that is present on everything at work. I also cleaned up the other side so that I could get a good ground for the MIG welder I planned to use to make the part useable again.
Once you have filled the gouges, get your flap disc out and sand down any raised areas. You might have to fill and file a few times to get it right. Take your time. You are saving money. Significant money.


And here we are with no more voids, everything all filled in, but now the hole for the end cap is out of round. I used a grinding stone and a half round file to slowly remove material from the area I just filled in. Just enough to allow the cap to fit snugly into the hole. If you take your time, you will not have to fill in and you can get your axle back into service. File and grind a little at a time and test fit often.

After about 45 minutes of work, I had not only repaired the half shaft but I had also reassembled the shaft. It is now ready to go back into the truck.
Tools used (metal repair only)
*MIG welder
*Welding mask
*Gloves
*4 1/2" grinder with flap disc installed
*2" air angle grinder with 2" green sanding pad and later small grinding stone
(Universal joint installation)
*3 pound hammer
*Socket to counter sink the end caps as needed
Points to ponder:
*This does NOT make a good first time project. You have to be honest with yourself regarding your ability to use a welder. If in doubt, seek professional assistance or farm the project out.
*Patience is a virtue when making this repair. When you rush the job, it shows. Take your time.
*Eye, ear, and hand protection are necessary when working with metal. That being said spend a few bucks on these items. Cheap stuff is not good and good stuff is not cheap.
Subscribe to:
Posts (Atom)